Remember sneaking vanilla wafers from the box before they made it into banana pudding, the way they'd stick to the roof of your mouth? This vintage homemade vanilla wafers recipe from the 1950s creates that exact crispy-tender texture using real butter and vanilla. No fancy ingredients or equipment required. The dough does need three hours to chill before slicing, but that's unattended time when the fridge does all the work.
I've been making these vanilla wafers from scratch for years, and here's what keeps me coming back: you taste actual vanilla and butter, not the synthetic vanilla flavor that's been standard in commercial versions since 1994.
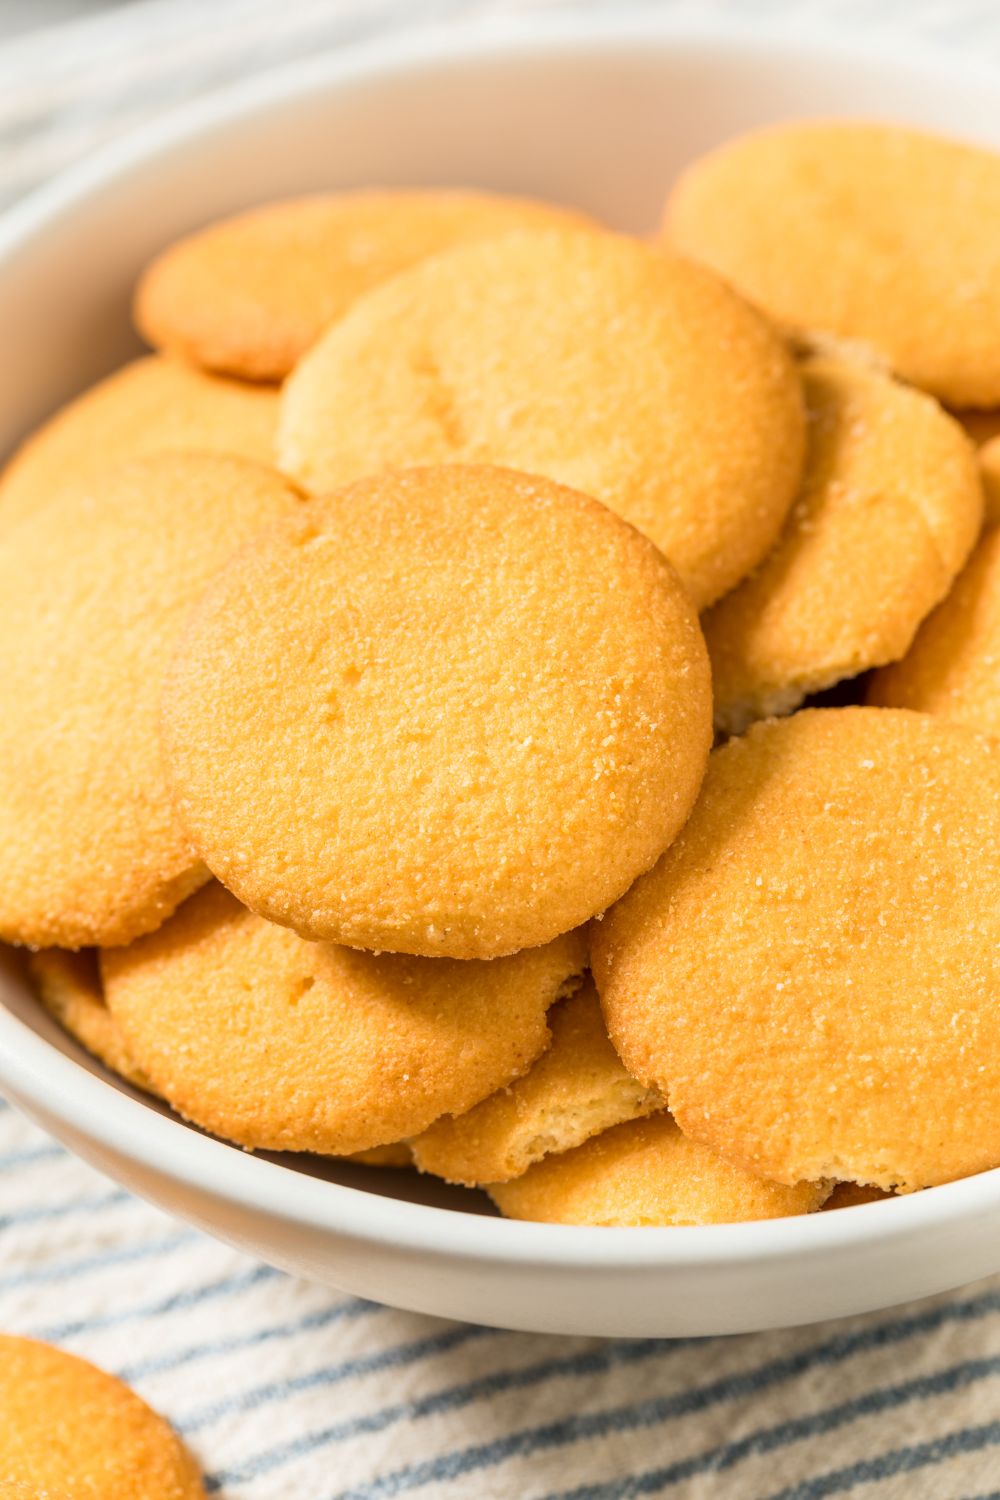
These wafers bake up crisp around the edges with centers that stay tender enough to melt on your tongue. They're sturdy enough for banana pudding but delicate enough to enjoy with afternoon tea. You'll get about seven dozen cookies from one batch, which means you can fill your cookie jar and still have plenty for gifting.
Back in the 1950s Kitchen
As these vanilla wafers baked, families might have gathered around new television sets to watch I Love Lucy or The Honeymooners, shows that were bringing comedy into living rooms for the first time in full episodes every week. American homes were filling with modern conveniences like electric mixers and Pyrex baking dishes.
This recipe appeared in countless church cookbooks and community collections, designed for home bakers who wanted quality cookies without spending all day in the kitchen. Don't be surprised by its simplicity - that's exactly what made it a keeper during an era when efficiency met genuine homemade goodness.
What Makes This Vintage Vanilla Wafers Recipe Work
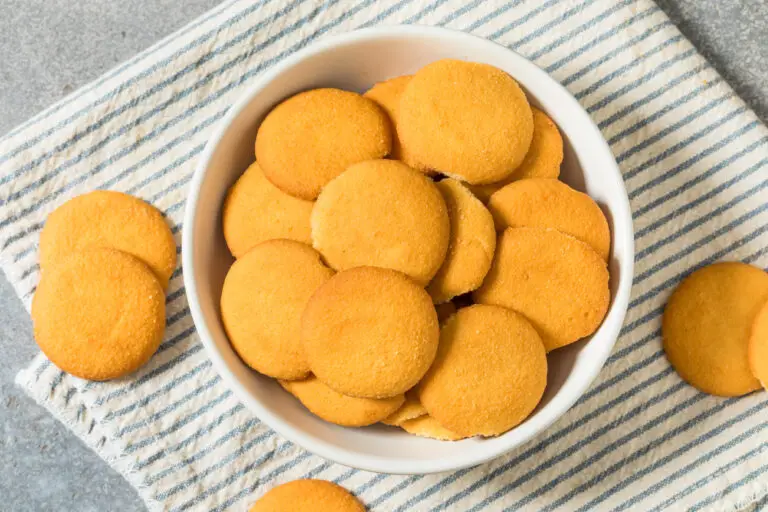
1950s Crispy Homemade Vanilla Wafers Recipe
This authentic 1950s vanilla wafers recipe creates perfectly crispy cookies with tender centers using real butter and vanilla. Ready in under 30 minutes of hands-on time, these homemade wafers taste infinitely better than store-bought versions and are perfect for banana pudding, snacking, or gifting. The roll-and-slice method ensures uniform cookies that bake evenly every time.
- Total Time: 3 Hours 25 Minutes
- Yield: 7 Dozen 1x
Ingredients
- 3 cups sifted all-purpose flour
- 3 teaspoons baking powder
- 1/2 teaspoon salt
- 1/2 cup unsalted butter
- 1 cup granulated sugar
- 2 large eggs, unbeaten
- 1 tablespoon vanilla extract
Instructions
- Sift dry ingredients: Measure flour, baking powder, and salt into a sifter. Sift together into a medium bowl and set aside.
- Cream butter and sugar: In a medium-sized mixing bowl, cream butter (or margarine) until soft and smooth. Add sugar gradually, creaming after each addition until the mixture is light and fluffy, about 3-4 minutes.
- Add eggs and vanilla: Beat in eggs and vanilla extract until completely combined and mixture looks smooth.
- Combine wet and dry: Add the sifted dry ingredients to the creamed mixture and blend well until no dry flour streaks remain. Do not overmix.
- Shape and chill dough: Divide dough in half. Shape each half into a roll about 2 inches in diameter. Wrap each roll tightly in waxed paper or plastic wrap. Chill in refrigerator until firm, about 3 hours.
- Bring oven to temp: Preheat oven to 400°F.
- Slice dough: Place chilled rolls on a cutting board covered with waxed paper. Using a sharp knife, cut dough into ⅛-inch thick slices. Place slices on ungreased cookie sheets, spacing them about 1 inch apart.
- Bake: Bake in preheated 400°F oven for about 10 minutes, or until edges are lightly golden brown. Watch carefully during the last few minutes to prevent burning.
- Cool: Remove from oven and let cool on baking sheets for 2-3 minutes, then transfer to wire racks to cool completely.
- Prep Time: 15 Minutes
- Chill Time: 3 Hours
- Cook Time: 10 Minutes
- Category: Dessert
- Method: Baking
- Cuisine: American
How to Make Perfect Homemade Vanilla Wafers
Recipe Variations, Serving Ideas, & Storage
Recipe Variations
Frequently Asked Questions
Yes, these vintage vanilla wafers are perfect for advance baking. Prepare the dough, shape it into logs, and refrigerate for up to 3 days before slicing and baking. You can also freeze the shaped dough logs for up to 3 months. For the best texture, bake cookies fresh within 1-2 days of serving.
If your wafers spread into thin, flat discs, your butter was probably too soft or melted. Butter should be at cool room temperature, not warm or greasy. Make sure you're chilling the dough rolls for the full three hours before slicing, which firms up the butter and prevents excessive spread during baking.
I would not use margarine. Butter produces far superior flavor and texture. Margarine has more water content and will create cookies that spread more and have less flavor. If you must use margarine, choose stick margarine (not tub or whipped) with at least 80% fat content.
Aim for ⅛-inch thickness, which is about the thickness of two stacked quarters. Thinner slices will burn before the centers set. Thicker slices won't develop crispy edges and will taste more like soft sugar cookies. Use a ruler the first time to calibrate your eye.
This 1950s recipe uses real butter and real vanilla extract, which creates authentic vanilla flavor you can actually taste. Modern commercial vanilla wafers switched to synthetic vanillin in the 1990s, which is why store-bought versions taste different from what you might remember from childhood. This recipe also uses a roll-and-slice method instead of drop cookies, ensuring uniform size.
Absolutely. Shape the dough into logs, wrap tightly in plastic wrap and then aluminum foil, and freeze for up to 3 months. You can slice and bake directly from frozen (add 1-2 minutes to baking time), or thaw overnight in the refrigerator before slicing for easier cutting.
You need real vanilla extract, not imitation vanilla flavoring. The recipe calls for one tablespoon, which is more than most modern recipes. Don't reduce it. Also, make sure your baking powder is fresh (less than 6 months old). Old baking powder contributes a metallic taste that masks the vanilla.
Use an airtight container and include a slice of white bread, which absorbs excess moisture and keeps cookies crisp. Replace the bread slice every 2-3 days. Never store them in the refrigerator, as the humid environment will make them soft. Room temperature in a sealed container works perfectly for up to 5 days.
Yes, but I recommend waiting at least 2 hours after baking for them to fully crisp up and cool completely. Warm cookies will make your pudding layer watery. These homemade vanilla wafers hold up better in banana pudding than store-bought versions because they're thicker and sturdier.
Roll each half of the dough into a log about 2 inches in diameter and roughly 8-10 inches long. This diameter produces cookies that are similar in size to commercial vanilla wafers. Larger diameter rolls create cookies that won't fit properly in standard banana pudding dishes.
Pin This Crispy Homemade Vanilla Wafers Recipe For Later
A Cookie That Earns Its Place
These vintage vanilla wafers prove that the simplest recipes often outlast the trendy ones. Real ingredients, straightforward technique, and a flavor that actually tastes like vanilla instead of a science experiment.
What's your favorite way to enjoy vanilla wafers? Are you team banana pudding, or do you eat them straight from the jar with a glass of cold milk?
If you make this homemade vanilla wafers recipe, please leave a rating and review!

0 comments