Old fashioned rhubarb pie has been cooling on American windowsills since at least the 1820s, when rhubarb first crossed from apothecary shelves into farmhouse kitchens and home bakers began transforming its famously tart stalks into one of the most enduring pies in American culinary history.
The beauty of homemade rhubarb pie is its honesty: five real ingredients, a straightforward method, and a filling that bubbles up tart and fragrant without requiring you to do anything fussy. The only thing standing between you and a perfect slice is knowing a handful of techniques that old-fashioned recipes took for granted.
My mom kept a rhubarb patch in Indiana for years, and she always said you "had to get the twist right" when harvesting the stalks. She meant it: you grip low on the stalk and twist-and-pull rather than cutting, which keeps the crown of the plant intact so it comes back strong the following spring.
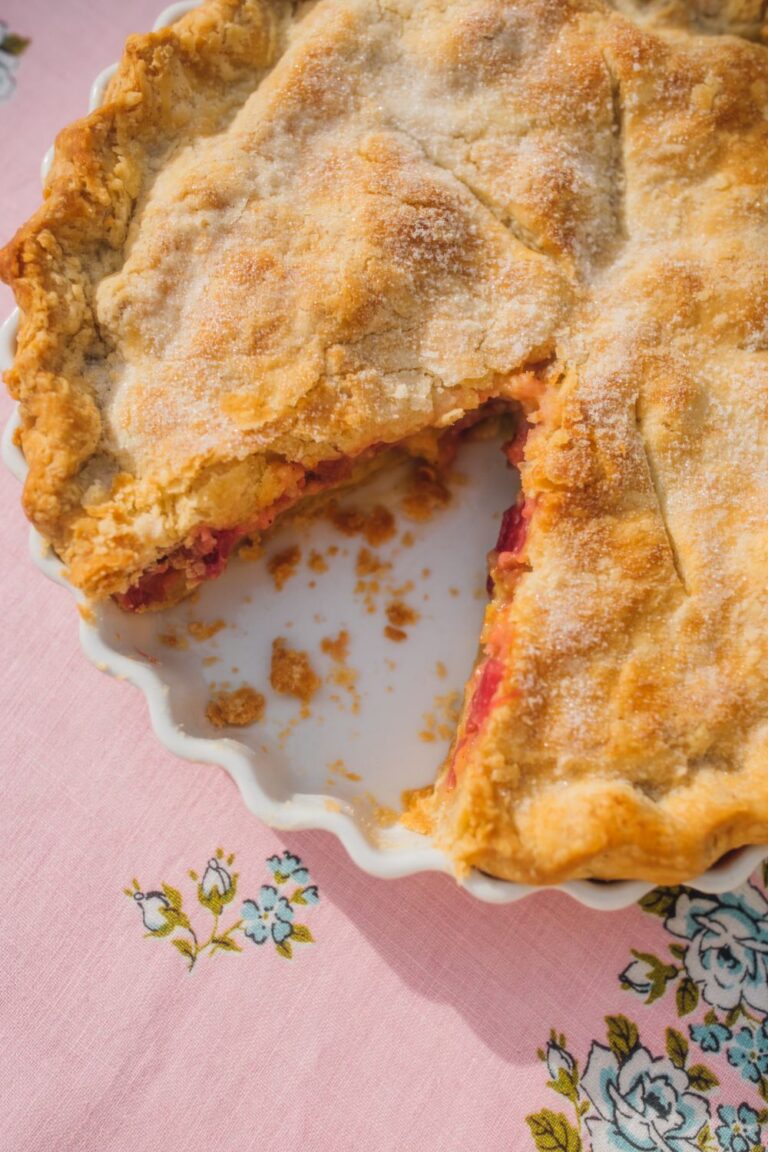
Old Fashioned Rhubarb Pie Recipe
Old fashioned rhubarb pie appears in American recipe collections as far back as the 1820s, when rhubarb shifted from a medicinal plant used in pharmacies to a prized filling for home bakers across the Northeast and Midwest. This version uses a spiced sugar mixture layered directly into the bottom crust before the rhubarb filling is piled on top, a technique found in early 19th-century farmhouse recipes that ensures even sweetness and a thickened, jammy filling rather than a watery one. The result is a deeply tart, warmly spiced pie with a shattering flaky crust, best served warm with a scoop of vanilla ice cream.
- Total Time: 85 Minutes
- Yield: 8 Slices 1x
Ingredients
- Top and bottom pie crust (store-bought or homemade)
- 5 cups sliced rhubarb (about 1 1/3 pounds)
- 1 1/3 cups sugar
- 6 tablespoons all-purpose flour
- 1/8 teaspoon kosher salt
- 1/2 teaspoon ground cinnamon
- 1/4 teaspoon freshly grated nutmeg
- 1 large egg beaten with 1 teaspoon water, for an egg wash
- 1 tablespoon turbinado sugar
Instructions
- Step 1: Set up your station before the oven even warms up
Preheat your oven to 450 degrees F and move the rack to the lowest position. Set a rimmed baking sheet on the rack while the oven preheats. It’ll catch any bubbling juices and give your bottom crust an extra blast of direct heat. - Step 2: Make the spiced sugar mixture
In a large bowl, combine the sugar, flour, cinnamon, nutmeg and salt. Whisk until the mixture looks uniform, with no visible streaks of flour. This spiced sugar blend does double duty: the sugar draws out the rhubarb’s natural juices and the flour absorbs them as they cook, turning what could be a soupy filling into a glossy, thick rhubarb mixture that holds a clean slice. Set the bowl aside. - Step 3: Roll and chill your bottom crust
On a lightly floured surface, roll out half of your pie dough into a circle roughly 12 inches across. Transfer it to a 9-inch pie plate, press it gently into the corners, and let the edges hang over the rim for now. Slide the whole pie plate into the refrigerator while you roll out your top crust. - Step 4: Fill the pie
Pull the bottom crust out of the refrigerator. Sprinkle a couple tablespoons of the spiced sugar mixture evenly over the bottom crust, reaching all the way to the edges. This bottom layer of sugar acts as a light barrier between the raw dough and the wet fruit. Add the fresh rhubarb to the bowl with the remaining spiced sugar mixture and toss until the stalks are evenly coated. Pile the rhubarb filling into the bottom crust, mounding it slightly in the center since the filling will settle during baking. - Step 5: Choose your top crust and seal the pie
+ Option 1, Classic Full Top Crust: Lay the rolled top crust over the rhubarb filling. Trim both layers of dough to about one inch of overhang, then fold the edge under itself and crimp or flute to seal. Cut four or five steam vents in the top of your pie with a sharp knife; vents prevent the top crust from puffing up and cracking in a way you didn’t plan for.
+ Option 2, Lattice Top: Cut your rolled top crust into strips roughly one inch wide. Weave them over the rhubarb filling in a classic lattice pattern, then press the strip ends onto the bottom crust edge and crimp to seal. A lattice top lets you see those gorgeous, bubbling rhubarb juices and makes your pie look like it belongs on the cover of a 1952 farm journal. Either way, you’re getting a beautiful pie. - Step 6: Egg wash and turbinado sugar
Brush the entire top crust, including the crimped edges, with the egg wash. Then sprinkle the tablespoon of turbinado sugar generously over the surface. Coarse sugar bakes into a crackly, sparkly crust that you can hear when you tap it with a spoon. - Step 7: Bake low, then lower
Set the pie on your preheated baking sheet and slide it onto the lowest rack. Bake at 450 degrees F for 15 minutes, then reduce the oven temperature to 350 degrees F without opening the door. Bake for an additional 40 to 45 minutes, until the top crust is deep golden brown and the juices are actively bubbling through the vents or lattice. If the edges start browning too quickly before the center is done, tent just the outer crust with strips of foil. Pull the pie when the filling is truly bubbling, not just steaming; bubbling means the flour has reached the temperature it needs to fully thicken the rhubarb filling. - Step 8: The hardest step in the whole recipe
Let the pie cool on a wire rack for at least two hours before slicing. The filling continues to set as it cools, and if you cut into it warm, you’ll get a runny, beautiful mess. It’ll still taste incredible, but it won’t hold a slice. Two hours. You can do it.
- Prep Time: 25 Minutes
- Cook Time: 60 Minutes
- Category: Dessert
- Method: Baking
- Cuisine: American
Pin This Old Fashioned Rhubarb Pie Recipe For Later
Back in the Day: Rhubarb Was Medicine Before It Was Pie
Rhubarb has one of the stranger origin stories in the American kitchen. For centuries before it landed in pie plates, rhubarb root was imported from China and Central Asia as a prized pharmaceutical, used to treat everything from fevers to digestive complaints.
By the early 1800s, botanists and home gardeners in New England and the Mid-Atlantic began cultivating rhubarb stalks in kitchen gardens, and someone, somewhere, made the pivotal decision to dump sugar on sour rhubarb stalks and bake them in a crust.
By the 1820s and 1830s, rhubarb pie recipes began appearing in American recipe collections and agricultural journals, frequently called "pie plant" pie because early home cooks needed a way to explain what that enormous, leafy thing in the garden actually was.
The recipes from that era are strikingly similar to what you'll make today: rhubarb, sugar, flour or cornstarch, sometimes a spice or two, and a simple crust. Two hundred years of home bakers tried to improve on this formula, and it turns out there wasn't much to improve.
Rhubarb became especially embedded in Midwest and Great Lakes kitchen culture, particularly in Wisconsin, Michigan, Indiana, and Minnesota, for a straightforward reason: rhubarb is one of the first edible plants to emerge in spring in cold-climate gardens, often pushing up through the soil while there's still frost in the forecast.
In an era before refrigerated transport made year-round fruit available, fresh rhubarb was a genuine seasonal event. Families kept rhubarb patches for decades, even generations, which is why so many people across the Midwest have a story exactly like my mother's Indiana patch, passed down along with the knowledge of how to harvest it without damaging the crown.
Why Old Fashioned Rhubarb Pie Works (And Why Modern Versions Often Don't)
Most rhubarb pie problems come down to one of three things: a filling that's too wet, a bottom crust that's underbaked, or a ratio of sugar to fruit that leaves the pie either puckering-tart or cloyingly sweet. The original farmhouse approach to this recipe solved all three before modern baking science had a name for any of it.
How Flour and Sugar Work Together to Thicken the Rhubarb Filling
Rhubarb stalks are almost entirely water. As they bake, they release an enormous amount of liquid, and if your recipe doesn't account for that, you end up with a pool of sugary juice where a firm filling should be.
The six tablespoons of all-purpose flour in this recipe absorb that liquid as the pie bakes, thickening the rhubarb mixture into a glossy, spoonable consistency that still holds its shape when you cut a slice. It's a technique that predates cornstarch as a thickener and works just as reliably.
Cinnamon and Nutmeg Belong. Believe it.
Rhubarb has a sharp, almost green tartness that benefits from warm spice the way a dry wine benefits from a little food alongside it. No, this isn't a Christmas pie, but the cinnamon rounds out the edges of that tartness without masking it, and the freshly grated nutmeg, if you choose to use it, adds a faint floral warmth that makes the filling taste more complex than a short ingredient list would suggest.
The Two-Stage Oven Temperature Is Not Optional
Starting at 450 degrees F sets the bottom crust before the filling has a chance to soak through it, and the blast of heat helps the top crust puff and set so it doesn't collapse onto the rhubarb.
Dropping to 350 degrees F after the first 15 minutes allows the filling to cook through slowly and the rhubarb mixture to thicken evenly without scorching the edges.
Rhubarb pie baked at a single moderate temperature the whole way through almost always comes out with an underdone bottom and overbrowned top. The two-stage method has been the standard in farmhouse rhubarb pie recipes for well over a century, and it's still the right call.
How to Make Perfect Old Fashioned Rhubarb Pie Every Time
The biggest challenge with homemade rhubarb pie isn't the filling; it's the crust. Specifically, it's the gap between the flaky crust you're picturing and the tough, pale, slightly sad one that sometimes shows up instead. Here's exactly what separates the two.
Keep Everything Cold Until It Goes Into the Hot Oven
Cold butter in pie dough creates steam pockets as it bakes, and those steam pockets are what produce the flaky, layered texture in a great crust. The moment your butter gets soft and blends smoothly into the dough, you've lost those layers.
If you're making homemade pie crust, use cold butter cut into small pieces, add ice water a tablespoon at a time, and stop mixing the moment the dough just comes together. Wrap it in plastic wrap and refrigerate it for at least 30 minutes before rolling.
If you're using store-bought dough, let it come to a pliable but still cold temperature, not room temperature, before you unroll it.
Use a Sharp Knife or Bench Scraper for Clean Lattice Strips
If you're going for the lattice top, the cleanliness of your cuts matters more than the width of the strips. A sharp knife or bench scraper through chilled dough gives you strips with clean edges that hold their shape as they bake.
Warm, soft dough tears and stretches, and uneven lattice strips tend to bake at different rates. Cut your strips on a lightly floured surface, then slide them onto a parchment-lined baking sheet and return them to the refrigerator for 10 minutes before weaving.
Cold strips over a filled pie are far easier to handle than strips that have been sitting on the counter.
How to Harvest Fresh Rhubarb Without Hurting the Plant
If you're lucky enough to have a rhubarb plant or access to a farmers market during rhubarb season, you want stalks that are firm, brightly colored, and free of soft spots. Green rhubarb is perfectly usable; the red color in rhubarb stalks is largely cosmetic and doesn't affect flavor the way most people assume.
To harvest from a living plant, grip the stalk close to the base and twist-and-pull in one motion rather than cutting. Cutting leaves a stub that can rot and damage the crown. Only harvest stalks that are fully grown and never take more than one-third of the plant at a single harvest.
Let the Egg Wash Dry Slightly Before Adding Sugar
Brush your egg wash over the entire top crust and let it sit for two to three minutes before adding the turbinado sugar. A slightly tacky surface holds the coarse sugar in place better than a wet one, which means more of that crackly, golden brown sugar survives the oven rather than sliding off the edges. This is the kind of detail that makes your pie look intentional rather than accidental.
Don't Skip the Baking Sheet
Set the pie on a rimmed baking sheet every single time. Rhubarb filling bubbles aggressively, and it will overflow onto your oven floor if you don't catch it. Cleaning baked-on rhubarb juice out of an oven is exactly as tedious as you're imagining. The baking sheet also conducts extra heat to the bottom of the pie plate, which helps with that all-important bottom crust.
Recipe Variations, Serving Ideas, & Storage
Recipe Variations
Old fashioned rhubarb pie is one of those recipes that genuinely doesn't need much tinkering, but a few well-known variations are worth knowing.
Tools and Ingredients Worth Having For This Recipe
You don't need a professional pastry kitchen to turn out a beautiful old fashioned rhubarb pie, but a few well-chosen tools make the difference between a crust you're proud of and one you'd rather not discuss. These are the items that earn their counter space.
A Reliable 9-Inch Pie Plate: Glass and ceramic pie plates distribute heat more evenly than thin metal ones, and they let you peek at the bottom crust to judge its color before you commit to pulling the pie. A deep-dish plate gives the rhubarb filling the room it needs without spilling over the edges during baking.
A Trusty Pastry Blender: If you're making homemade pie crust, a sturdy pastry blender cuts cold butter into flour quickly and cleanly without warming the fat the way your hands inevitably will. The ones with a comfortable grip and thick wires hold up under pressure without bending.
A Pastry Mat With Measurement Guides: Rolling pie dough to a consistent circle is significantly easier when you have a guide printed directly on the surface. A silicone or canvas pastry mat keeps the dough from sticking, gives you a target diameter to roll toward, and wipes clean between uses.
A Lattice Cutter or Pastry Wheel: If you're going for the lattice top, a multi-strip pastry roller cuts perfectly even strips in one pass across the dough. A single-wheel pastry cutter works well too and gives you clean, slightly decorative edges on each strip. Either one is a tool you'll reach for every time you bake a fruit pie.
Turbinado Sugar: The coarse, amber crystals of turbinado sugar don't dissolve into the egg wash the way granulated sugar does, which means they survive the oven and bake into that crackly, caramelized finish that makes a homemade pie look intentional. A bag lasts through an entire baking season and works beautifully on muffins, scones, and quick breads too.


Frequently Asked Questions
The best rhubarb for homemade rhubarb pie is firm, crisp stalks with no soft spots, harvested during peak rhubarb season in late spring and early summer.
Red and green rhubarb are both excellent choices; the color difference is mostly cosmetic and doesn't meaningfully affect flavor.
If you're sourcing from a farmers market, ask when the stalks were harvested; fresh rhubarb bakes up firmer and holds its shape better in the filling than rhubarb that has been sitting for several days.
A watery rhubarb pie filling is almost always a flour ratio issue or a baking time issue, and neither one is your fault when the recipe doesn't explain the "why."
Rhubarb stalks release a large amount of liquid as they bake, and if the flour in the filling hasn't had enough time at temperature to absorb and thicken that liquid, you'll get a soupy filling.
Make sure the pie bakes long enough that the juices are actively bubbling, not just steaming, before you pull it from the oven. Bubbling juices mean the filling has reached the temperature needed for the flour to fully thicken.
Frozen rhubarb works in old fashioned rhubarb pie, but it requires one extra step: thaw the rhubarb completely and drain the excess liquid before adding it to the filling.
Frozen rhubarb releases significantly more water than fresh as it thaws, and if you skip the draining step, that extra liquid can overwhelm the flour's ability to thicken the filling. Pat the thawed stalks dry with a clean towel, then proceed with the recipe exactly as written.
Store-bought pie crust works well for old fashioned rhubarb pie and produces a genuinely good result. Let the crust come to a pliable but still cold temperature before unrolling it, and don't skip chilling the bottom crust before you fill it.
The filling and technique in this recipe are strong enough to carry the pie even if you're not making your dough from scratch on a Tuesday afternoon.
Three things work together to protect the bottom crust: chilling it before filling, sprinkling one-third of the spiced sugar mixture directly on the dough before adding the rhubarb, and baking on the lowest rack at a high initial temperature.
The cold crust sets quickly in the hot oven before the filling has a chance to soak through, the sugar layer absorbs the first wave of juice, and the direct heat from the lower rack ensures the bottom gets fully baked before the top over-browns.
You don't need to peel rhubarb stalks for pie. The outer skin softens completely during baking and disappears into the filling. Simply wash the stalks, trim the ends, and slice them into small pieces.
The one part of the rhubarb plant you should never eat or use is the leaves, which contain high levels of oxalic acid and are toxic.
Old fashioned rhubarb pie can be made one day ahead and held at room temperature, loosely covered. The crust stays in good shape for about two days.
For longer storage, freeze the fully baked and cooled pie, wrapped tightly, for up to three months. You can also freeze the unbaked assembled pie and bake it directly from frozen, adding about 15 minutes to the baking time.
Old fashioned rhubarb pie uses just the rhubarb stalks, sugar, flour, and spices, allowing the pure tart flavor of the rhubarb filling to come through clearly.
Rhubarb custard pie adds eggs, butter, and sometimes cream to the filling, producing a rich, set custard around the cooked rhubarb.
Both versions appear in American rhubarb recipes going back to the 1800s; the custard version tends to be a later development that became popular as home bakers had access to more reliable egg supplies.
Pie crust shrinks when the gluten in the dough is overworked or when the dough goes into the oven warm. Work your dough as little as possible, chill it thoroughly before rolling, and chill it again after fitting it into the pie plate.
If the dough springs back stubbornly when you try to roll it, wrap it and refrigerate it for 10 more minutes rather than forcing it.
Well-rested, cold dough rolls smoothly, fits the pan without shrinking, and stays put in the oven.
Rhubarb pie is done when the top crust is deep golden brown, the crimped edges are set and colored, and the filling is visibly bubbling through the steam vents or lattice.
If you can hear a low bubbling sound when you lean toward the oven, that's a good sign. Don't rely on color alone; the crust can look done before the filling is fully thickened. When in doubt, give it five more minutes.
Welcome To The Pie Plant Club
If you grew up in a kitchen with a rhubarb patch outside the back door, you already know that a homemade rhubarb pie doesn't need to be complicated to be worth making every single year.
If you're making one for the first time, welcome to the club that has been meeting since the early 1800s. It's a good club. The dues are cheap, and the pie is excellent.
Did your family have a rhubarb patch? Did someone in your house have opinions about the "right" way to harvest it? Tell me in the comments below, and if you make this pie, please leave a rating. It helps more than you know.

0 comments