No-bake school lunchroom peanut butter bars are the ones you've been searching for — five ingredients, a 9x13 pan, and a top layer of milk chocolate. The original recipe dates to 1978, and whoever developed it for institutional kitchens deserves a monument, because it has outlasted every food trend of the last five decades without blinking.
These bars hit a very specific memory for a lot of people: the cold cafeteria tray, the wax paper squares, the way that chocolate layer cracked just slightly when you bit in. You weren't sure what was in them. You just knew you wanted the last one on the tray. This is that recipe, pulled from a 1978 newspaper clipping, reverse-engineered and tested at home so you get the same result — creamy peanut butter base, fudgy chocolate top, refrigerator-cold and impossibly rich — without needing to serve 300 people to justify making it.
Back in the 1970s Cafeteria
I was 8 years old in 1978. At that time, school lunch cost about 35 cents. The menu cycled through pizza Fridays, rectangular cardboard pizza that nobody complained about, and a rotating cast of dessert bars that showed up on wax paper next to a carton of whole milk.
John Travolta was on every magazine cover after Saturday Night Fever. The Bee Gees were inescapable. And somewhere in an institutional kitchen, a cafeteria lunchlady pressed a batch of these peanut butter bars into a commercial sheet pan and slid them into a refrigerator the size of a small bedroom. They came out cold, dense, and covered in chocolate. Every kid at every table reached for the last one.
Here's the thing. The reason these bars worked in a cafeteria wasn't that they were fancy. It was that they were nearly impossible to mess up, required no oven, held perfectly cold for hours on a tray, and tasted like a Reese's cup that had been given a little more ambition and a lot more powdered sugar. That combination didn't survive five decades by accident.
What Makes These Peanut Butter Squares Irresistible
Easy 1970s No Bake Peanut Butter Bars
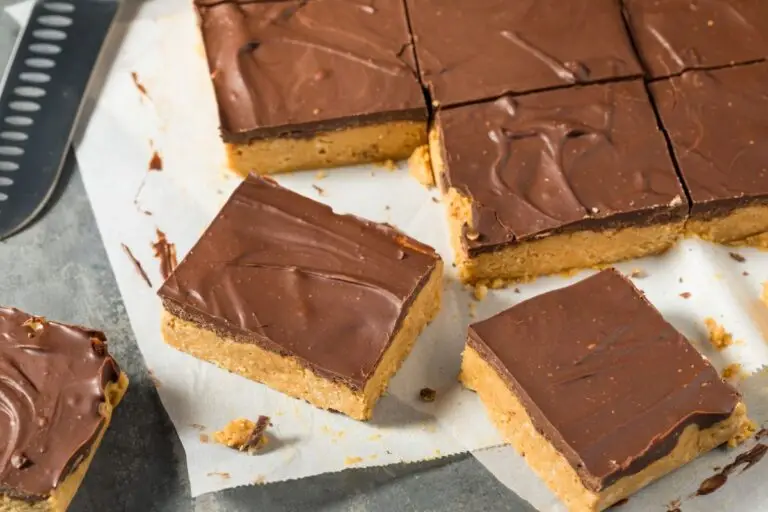
These no-bake peanut butter bars are the school cafeteria classic you’ve been chasing since childhood. A dense, creamy peanut butter and graham cracker base gets pressed into a 9×13 pan and topped with a smooth milk chocolate layer, then refrigerated until cold and cut into squares. Five ingredients. No oven. Exactly as good as you remember.
- Total Time: 1 Hour 20 Minutes
- Yield: 24 Servings 1x
Ingredients
- 1/3 pound (about 1 1/2 cups) finely crushed graham cracker crumbs
- 1/2 pound (2 sticks / 1 cup) unsalted butter, softened to room temperature
- 1 cup creamy peanut butter (not natural-style)
- 1 pound (about 4 cups) powdered sugar
- 12-ounce package milk chocolate chips
Instructions
- Line a 9×13 inch pan with parchment paper, leaving overhang on two sides.
- In a large bowl, beat together the softened butter, peanut butter, and graham cracker crumbs until creamy and smooth.
- Add the powdered sugar gradually, mixing until the dough is fully combined and no longer sticky. It will resemble a thick, slightly crumbly cookie dough.
- Press the peanut butter mixture firmly and evenly into the prepared pan. Use the bottom of a flat measuring cup to get an even, compact layer.
- Melt the chocolate chips in a double boiler over barely simmering water, stirring until completely smooth. Alternatively, microwave in 30-second intervals, stirring between each, until melted.
- Pour the melted chocolate over the peanut butter layer and spread evenly with an offset spatula.
- Refrigerate for at least 2 hours, or until the chocolate is fully set.
- Lift the bars out of the pan using the parchment paper overhang. Warm to room temperature, then cut into squares with a sharp knife. For clean cuts, wipe the blade between slices.

Notes
- Peanut butter: Use a conventional creamy peanut butter (such as Jif or Skippy). Natural peanut butter separates and produces an oily, unstable base that won’t hold together.
- Butter: Room temperature butter, not melted, is the original method. It creams with the peanut butter to produce a denser, more cohesive bar than the melted-butter shortcuts in many modern versions.
- Chocolate: The 1978 recipe specifies milk chocolate chips, which gives you the sweeter, creamier top that matches the cafeteria memory. Semi-sweet works if you prefer less sweetness.
- Cutting tip: For clean squares without cracking the chocolate layer, let the bars sit at room temperature for 5 minutes before cutting, and use a sharp chef’s knife.
- Yield note: A 9×13 pan cut into 4 rows x 6 columns yields 24 squares. For larger bars (closer to the cafeteria portion size), cut 3×4 for 12 pieces.
- Prep Time: 20 Minutes
- Chill Time: 1 Hour
- Category: Dessert
- Method: Refrigerated
- Cuisine: American
How to Make Perfect Peanut Butter Cup Squares
Recipe Variations, Serving Ideas, & Storage
Recipe Variations
Frequently Asked Questions
The classic version uses graham cracker crumbs, butter, creamy peanut butter, powdered sugar, and chocolate chips; five ingredients, no baking required. The 1978 recipe here uses those exact five components pressed into a 9x13 pan.
Natural peanut butter separates as it sits, which makes the base oily and unstable. It won't hold together when cut. Conventional creamy peanut butter (Jif, Skippy, or store brand) produces the right texture.
Yes. The base softens at room temperature and the chocolate layer loses its snap. Store them covered in the refrigerator and serve cold.
The two most common causes are cutting before the chocolate is fully set (give it at least 2 hours in the refrigerator) and using a dull blade. A sharp chef's knife pressed straight down, rather than dragged, prevents cracking.
An 8x8 or 9x9 pan works with a halved recipe, producing thicker bars. The original 9x13 yields a thinner, more cafeteria-accurate bar. A 9x13 [metal baking pan with a lid] keeps things contained in the refrigerator without requiring plastic wrap.
Up to 5 days in the refrigerator, or 3 months in the freezer. They're an ideal make-ahead dessert for holidays or gatherings.
These bars have a higher ratio of graham cracker crumbs and powdered sugar, making the base denser and less oily than the peanut butter filling in Reese's. They're also topped with a thinner chocolate layer, which gives you more peanut butter base in each bite.
Sure, but you'll need two 9x13 pans or one large commercial sheet pan. Don't try to pile a doubled recipe into a single 9x13 — the layers become too thick to cut cleanly.
Creaming softened butter with the peanut butter produces a lighter, more cohesive base than melted butter methods. Melted butter can make the base slightly greasy. The original method is worth the extra step.
Yes, the lunch lady bars served in school cafeterias across the country followed the same basic formula. Regional variations include different chocolate types (semi-sweet vs. milk chocolate), varying amounts of graham cracker crumbs, and some versions that used margarine rather than butter.
Pin This 1970s Lunch Lady Peanut Butter Bars Recipe For Later

Did your school cafeteria lunch ladies make these? The regional variations are genuinely fascinating - some schools used milk chocolate, others semi-sweet, and a few made them without any chocolate at all and topped them with more graham cracker crumbs. Drop your version in the comments.
If you make this recipe, a star rating goes a long way and it helps other people who are hunting for the exact same taste memory you had.
0 comments