This traditional braided challah bread delivers a tender, egg-rich crumb with a golden crust in just over 2 hours, using simple pantry staples you already own. After testing this recipe to perfect the proofing time and braiding technique, I can promise you'll get bakery-quality results with your first loaf. The honey adds just enough sweetness to balance the rich egg flavor, while the braiding creates that signature tear-apart texture perfect for Shabbat dinner or weekend French toast.
Challah on the Shabbat Table
Friday evenings carry a rhythm all their own. Candles flicker, voices rise in blessing, and the scent of fresh bread fills the kitchen. The challah sits center stage, its golden braid glistening under candlelight, waiting for that first tear that brings everyone together. This is bread with purpose, bread that marks time and honors tradition with every bite.
The Jewish Kitchen Tradition
For centuries, challah has graced Jewish tables as both a sacred symbol and a weekly staple. Before refrigeration and commercial bakeries dotted every neighborhood, Friday baking day transformed kitchens into fragrant workshops. Women would gather in the early morning, kneading dough by hand while children played nearby, the yeast blooming in warm ceramic bowls passed down through generations.
The braiding itself became a meditation, fingers working three strands into intricate patterns that represented unity, family, and the intertwining of the physical and spiritual worlds. Some families used six strands for special occasions, each representing a different aspect of faith and community. The practice of separating a small piece of dough before baking, an offering that connected the home baker to ancient Temple rituals, added spiritual weight to an already meaningful process.
In Eastern European shtetls, the smell of challah marked the approaching Sabbath as surely as the setting sun. Neighbors could tell whose oven was fired up, and the golden loaves cooling on windowsills became a shared signal that the week's work was ending and rest was coming. The bread served a practical purpose, too. Its rich egg content made it substantial enough to sustain families for a day without cooking, while the slight sweetness of honey made even the simplest meal feel like a celebration.
Braided Challah Bread Recipe
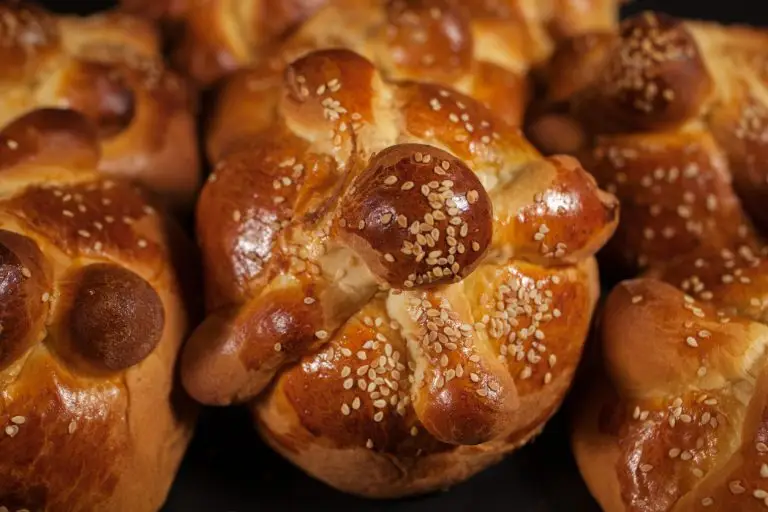
This golden, tender challah brings the comforting tradition of homemade bread to your kitchen. With its rich, slightly sweet flavor from honey and eggs, this beautifully braided loaf creates a soft, pillowy texture that’s perfect for Shabbat dinner or any special occasion. The classic three-strand braid not only looks impressive but also symbolizes the timeless connection between generations of home bakers who have lovingly crafted this cherished bread.
- Total Time: 2 hours, 35 minutes
Ingredients
- 1 (.25 ounce) package active dry yeast
- 1 cup warm water (100°F / 40°C)
- 3 tbsp honey
- 1 tsp salt
- 3 beaten eggs
- 3 1/2 cups all-purpose flour, plus more for kneading
- 1 beaten egg yolk, or more if needed
- 1 tbsp sesame seeds
Instructions
- In a large mixing bowl, combine the water and yeast, allowing the mixture to sit until the yeast completely dissolves – this should take around 10 minutes. Once dissolved, blend in the honey and salt until they’re fully incorporated, then add your beaten eggs.
- Gradually add the flour one cup at a time until you achieve a sticky dough consistency. Dust the dough lightly with flour and knead it thoroughly for about 5 minutes, working until the texture becomes smooth and elastic.
- Shape your dough into a tight, round ball and transfer it to a greased bowl. Roll the dough around in the bowl to coat all surfaces with oil, then cover with a moist kitchen towel. Allow the dough to rise in a warm spot until it doubles in volume – this typically takes 45 minutes to an hour.
- When risen, punch down the dough with your fist and divide it into three equal portions.
- On a flour-dusted work surface, roll each portion into rope-like strands roughly the width of your thumb and approximately 12 inches in length. Shape each rope so it’s thicker through the center and tapers toward both ends.
- Join the three strands at one end by pinching them together, then create your braid. Begin with the right strand, crossing it over the center strand to the left (this right strand now becomes your new center). Continue this braiding pattern, alternating from right to left, until you’ve braided the entire length. Pinch the bottom ends together and tuck them under for a clean finish.
- Transfer your braided loaf to a parchment-lined baking sheet and brush the surface with beaten egg yolk.
- Heat your oven to 350°F (175°C) and bake for 30-35 minutes until golden brown.
What Makes This Challah Recipe Work
How to Make Perfect Braided Challah
Recipe Variations
Frequently Asked Questions
Yes, freeze shaped, unrisen loaves on a baking sheet until solid, then wrap in plastic and foil. Thaw in the refrigerator overnight, bring to room temperature for 30 minutes, let rise until doubled, then bake as directed.
Your dough likely didn't rise long enough, or you added too much flour. The dough should fully double in size during both rises, which can take longer in cool kitchens. Use only as much flour as needed to make the dough workable.
Traditional challah requires eggs for its characteristic texture and flavor, but you can substitute 1/4 cup aquafaba (chickpea liquid) per egg for a vegan version. The texture won't be quite as rich but it still works.
Brush the loaf with egg wash twice: once before the second rise and again right before baking. Use a whole beaten egg or egg yolk mixed with a teaspoon of water for the shiniest results.
Yes, use the same amount of instant yeast and skip the dissolving step. Mix it directly with the flour, then add the liquids. The rise times will be slightly faster.
You don't need a loaf pan for traditional braided challah. Shape it free-form on a parchment-lined baking sheet. The braid holds its shape without a pan and bakes more evenly.
The dough strands weren't pinched together tightly enough at the ends, or you didn't knead the dough long enough to develop proper gluten structure. Make sure to knead for the full 5 minutes and pinch the ends firmly.
Bake challah the day before Thanksgiving and store wrapped at room temperature. Or freeze it a week ahead and thaw it the night before. It's perfect for holiday stuffing or as dinner rolls.
Wrap the bread loosely in aluminum foil and warm at 300°F for 10-15 minutes. For individual slices, use a toaster or toaster oven. Don't microwave challah; it turns rubbery.
Challah uses oil while brioche uses butter, making brioche richer and challah slightly lighter. Challah is also typically braided while brioche is often baked in a loaf pan. Both are enriched egg breads but have distinct textures.
What's your favorite way to enjoy fresh challah? Does it take you back to Friday night dinners at your grandmother's table, or have you discovered it more recently? If you make this braided challah bread, please leave a rating and review to let me know how it turned out for you!
0 comments