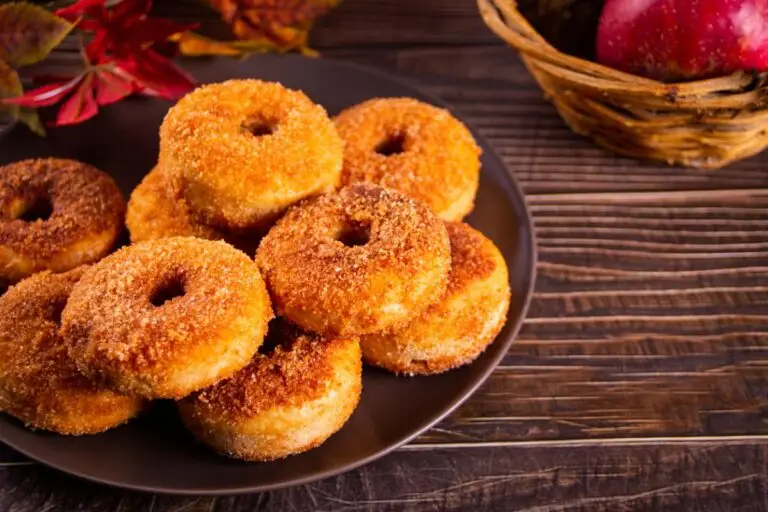
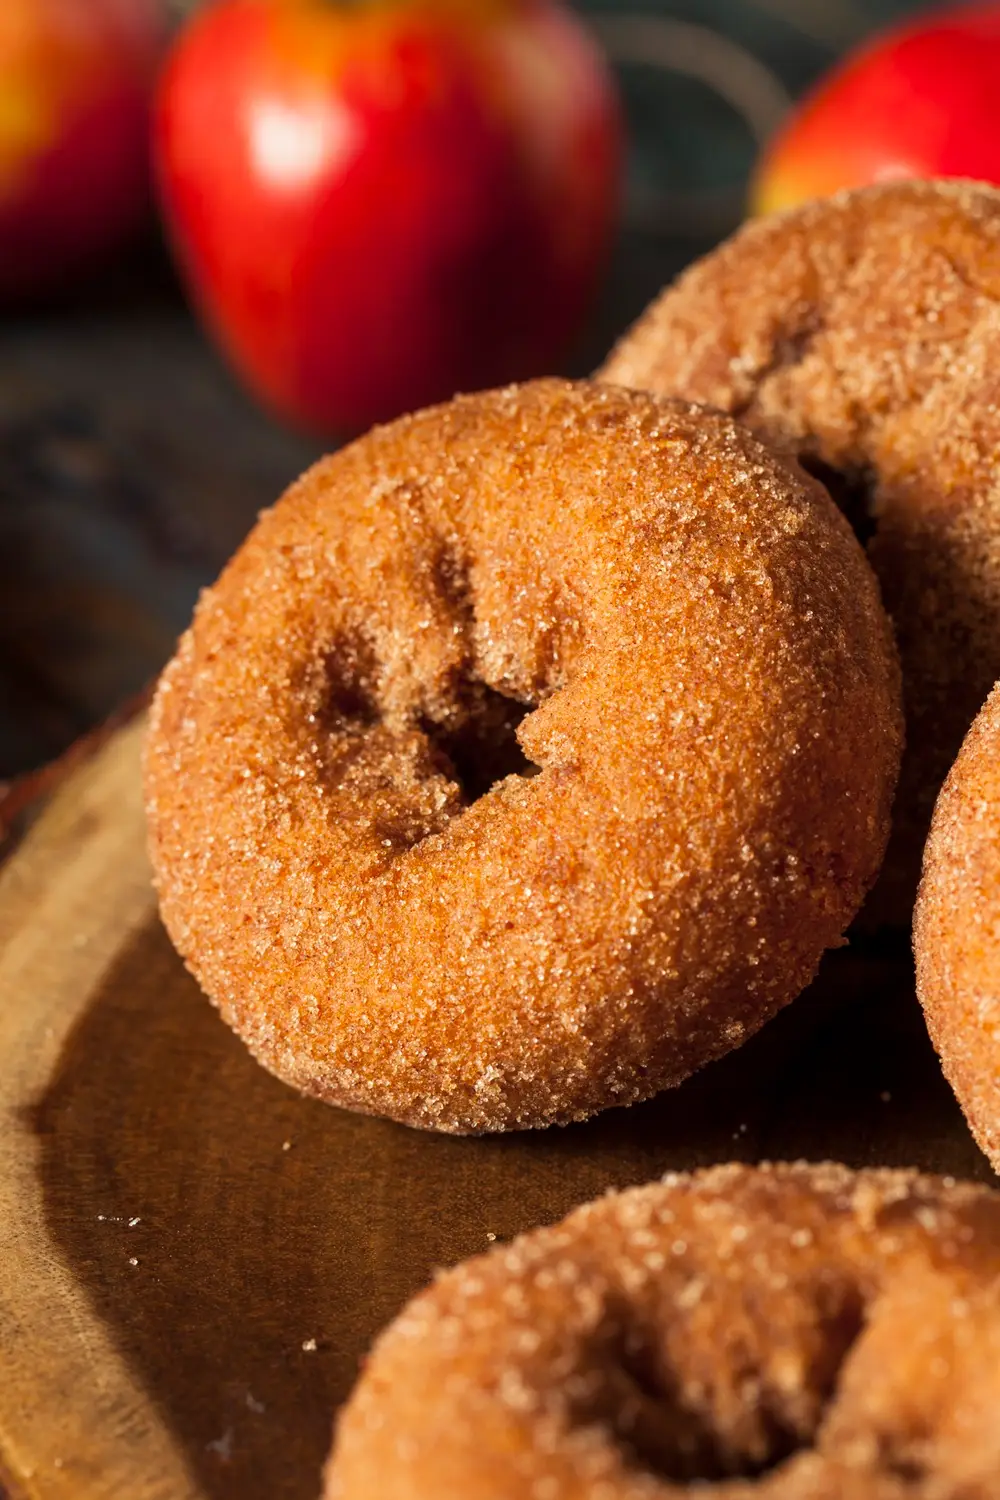
These old-fashioned Halloween doughnuts deliver tender, cake-style texture with warm spices, perfect for batch baking ahead of your Halloween party. The buttermilk and shortening combination creates doughnuts that stay moist for 2-3 days without refrigeration, making them ideal when you're hosting a crowd.
The scent of nutmeg and cinnamon mingling with hot oil transports you straight back to 1958 church basement Halloween socials and neighborhood block parties, when families gathered around console televisions and mothers rolled doughnut dough on candy pink Formica countertops. These doughnuts emerge from the fryer with crispy golden exteriors that give way to tender, spiced interiors dusted with granulated sugar while still warm.
Why Halloween Doughnuts Ruled the 1950s
Halloween looked completely different in 1958 than it does today. The candy industry hadn't yet dominated the holiday, so homemade treats ruled Halloween parties, with cake doughnuts holding pride of place alongside popcorn balls and candied apples. Budget-conscious home cooks appreciated that basic pantry staples like flour, eggs, buttermilk, and shortening produced dozens of doughnuts for less than a dollar, enough to feed an entire neighborhood of trick-or-treaters.
Doughnuts are connected to Halloween's deeper roots through the medieval tradition of "souling," where children received spiced soul cakes in exchange for prayers for the dead. When Irish immigrants brought this custom to America in the 1800s, the soul cake transformed into the fried cake doughnut we know today. By the 1920s through 1960s, doughnuts became the centerpiece of Halloween gatherings, served warm with hot apple cider to create an aromatic welcome that signaled autumn had truly arrived.
The affordability and crowd-pleasing nature of doughnuts made them essential for school carnivals, church socials, and neighborhood parties throughout October. Hostesses took pride in their doughnut-making skills, competing to create the lightest, most flavorful batches for their Halloween open houses.
What Makes This 1958 Recipe Special
The Buttermilk Advantage Buttermilk creates the signature tender crumb while adding subtle tang that balances the sweet sugar coating. The acidity reacts with baking soda to produce extra lift and create air pockets throughout the dough, giving these doughnuts their characteristic light texture despite being cake-style rather than yeast-raised. This chemical leavening reaction is why vintage bakers insisted on buttermilk rather than regular milk; without it, you'll end up with dense, heavy doughnuts that lack the proper rise.
The tangy flavor also prevents these doughnuts from tasting overly sweet, creating a better balance between the spiced dough and sugar coating. If you don't have buttermilk on hand, make a substitute by adding 1 tablespoon white vinegar or lemon juice to ¾ cup regular milk and letting it sit for 5 minutes before using.
The Shortening Secret Shortening keeps these doughnuts shelf-stable at room temperature for 2-3 days without going stale or requiring refrigeration. By contrast, butter contains 15-20% water that accelerates staling through moisture migration and crystallization, while shortening's pure fat content creates lasting moisture and tenderness. This made shortening the practical choice for 1950s batch baking when hostesses prepared dozens ahead of parties and needed treats that would stay fresh without modern airtight containers.
Shortening also contributes to the characteristic craggy exterior that old-fashioned doughnuts are known for, as it doesn't interfere with gluten development the way butter's water content does. The result is doughnuts with crispy, crackled outsides that hold glaze perfectly while maintaining soft, tender interiors.
The Warm Spice Triumvirate Cinnamon, nutmeg, and mace create aromatic depth without overwhelming sweetness. Nutmeg is the secret ingredient in nearly every vintage cake doughnut recipe; that warm, slightly sweet flavor you recognize but can't quite place. Mace, nutmeg's sister spice from the same plant, adds a sophisticated floral note and gentle heat that distinguishes vintage recipes from modern simplified versions.
These spices were Halloween staples in the 1950s, appearing in everything from doughnuts to pumpkin pie to spiced cider. The combination creates complexity that makes these doughnuts taste homemade and special rather than store-bought, even days after frying.
The Essential Chilling Step Refrigerating the dough for at least one hour firms up the fat, making the dough much easier to roll without using excess flour, which would make the doughnuts tough.
This vintage technique prevents the most common cake doughnut mistake: overworking the dough during rolling and cutting, which develops gluten and creates dense, chewy results instead of tender ones. Professional bakers chill doughnut dough for up to 24 hours to maximize tenderness and improve flavor development.
Cold dough also holds its shape better when it hits the hot oil, creating more uniform, professional-looking doughnuts with consistent rise and even browning. The chilled dough sinks to the bottom of the fryer briefly before floating, which creates the characteristic craggy top that makes old fashioned doughnuts instantly recognizable.
This 1958 recipe carries the warmth of Halloween’s sweetest tradition – old-fashioned cake doughnuts that once graced every Halloween banquet table. Whether dusted with sugar or served alongside hot apple cider, these tender doughnuts bring back the unhurried joy of a simpler Halloween, when homemade was always better and every treat told a story passed down through generations.
Total Time:1 hour + 50 minutes
Yield:2½ dozen 1x
Ingredients
UnitsScale
3 1/2cupssifted all-purpose flour
2 teaspoons baking powder
1 teaspoon baking soda
1/2 teaspoon cinnamon
1/2 teaspoon nutmeg
1/2 teaspoon mace
1 teaspoon salt
2 eggs
3 tablespoons shortening
1cupgranulated sugar
3/4cupsbuttermilk
Instructions
Preparing the Dough
Begin by whisking together the flour, baking powder, baking soda, cinnamon, nutmeg, mace, and salt in a large bowl.
In another bowl, beat the eggs until they’re light and fluffy – about 2 minutes with a hand mixer. Gradually beat in the shortening and sugar until the mixture becomes pale and creamy, then gently fold in the buttermilk.
Pour the wet ingredients into your flour mixture and stir just until the dough comes together. Remember, less is more here – overworking will make your doughnuts tough instead of tender. The dough should feel soft and slightly sticky to the touch.
Cover the bowl and let it rest in the refrigerator for at least one hour. This chilling time helps the dough firm up, making it much easier to roll and cut.
Rolling and Cutting
Turn your chilled dough onto a generously floured surface and gently pat it down to about ½ inch thick. Using a floured doughnut cutter (or a large glass and a small one for the center), cut straight down without twisting – this helps the doughnuts rise evenly.
Gather the scraps gently, press them together, and roll them out again for a second cutting. These “second-cut” doughnuts might not look as perfect, but they taste just as wonderful.
Frying to Golden Perfection
Heat about 1½ inches of vegetable oil in a heavy-bottomed pot or electric skillet to 370°F. This temperature is crucial – too hot and they’ll brown before cooking through, too cool and they’ll absorb too much oil.
Carefully lower 3-4 doughnuts into the hot oil at once, being careful not to overcrowd them. They should float immediately and start to puff up.
As soon as the doughnuts rise to the surface, gently turn them with a fork or chopstick, being careful not to pierce the dough. Continue turning them every 30-60 seconds until they’re golden brown on both sides – about 2-3 minutes total.
Lift the finished doughnuts from the oil with a slotted spoon and let them drain on paper towels. While they’re still warm, dust them with granulated sugar, cinnamon sugar, or powdered sugar for that perfect finishing touch.
Master the Mixing Technique Stop mixing the moment the flour disappears into the wet ingredients—you should still see a few small lumps. Overmixing is the number one cause of tough, dense cake doughnuts because it develops gluten strands that create a chewy rather than tender crumb. The dough should feel soft and slightly sticky to the touch, almost like thick cookie dough.
Mix on low speed if using a stand mixer, or fold gently by hand with a rubber spatula using as few strokes as possible. Under-mixing is always better than over-mixing with cake doughnuts—the heat of frying will finish bringing the dough together.
Nail the Oil Temperature Keep your frying oil between 360-375°F throughout the entire frying process for optimal results. Oil temperature is the single most critical factor in frying perfect doughnuts. Oil that's too cool (below 350°F) produces greasy, oil-soaked doughnuts that taste heavy and leave an unpleasant coating in your mouth. Oil that's too hot (above 385°F) burns the exterior before cooking the interior, leaving you with dark brown outsides and raw, doughy centers.
Invest in a candy thermometer or deep-fry thermometer and clip it to the side of your pot with the probe submerged in oil but not touching the bottom. Check the thermometer before adding each batch and adjust your burner heat to maintain consistent temperature—oil cools when you add doughnuts, so you may need to increase heat slightly between batches. Allow oil to return to target temperature before frying the next batch, even if it takes 2-3 minutes.
Cut Clean Without Twisting Press your doughnut cutter straight down through the dough in one smooth motion without twisting. Twisting seals and compresses the edges, preventing the doughnuts from rising properly in the oil and creating dense, flat results. Dip your cutter in flour between each cut to prevent sticking and ensure clean edges that will puff up beautifully when fried.
Use a 3-inch round cutter for the outer ring and a 1-inch cutter for the center hole—if you don't have a small cutter, the wide end of a large piping tip works perfectly. Brush off excess flour from cut doughnuts before frying to prevent burnt flour taste and ensure even browning.
Watch for the Critical Float Doughnuts are ready to flip the moment they float to the surface and begin to puff up, usually 60-90 seconds on the first side. This float is your visual cue that the bottom has set enough to flip without breaking apart. Flip gently using chopsticks, a wooden spoon handle, or heat-resistant tongs rather than piercing the dough with a metal fork or skewer, which releases steam and creates dense spots.
Continue flipping every 45-60 seconds until both sides are deep golden brown, about 2-3 minutes total frying time. The doughnuts should feel firm when gently pressed and spring back immediately. If you're unsure, sacrifice one doughnut from your first batch by breaking it open to check for any raw dough in the center, then adjust frying time accordingly for remaining batches.
Drain Properly for Crispy Results Let finished doughnuts drain on paper towels placed over a wire cooling rack for maximum crispness. The wire rack allows air circulation underneath while paper towels absorb excess oil on top, preventing the bottoms from becoming soggy. Avoid placing doughnuts directly on paper towels on a flat surface, which traps steam and makes them soft.
Sugar doughnuts while still warm (within 1-2 minutes of draining) so the coating adheres properly without falling off. If glazing, let them cool for 3-5 minutes so the glaze sets properly rather than sliding off completely, creating that classic crackled appearance.
Essential Equipment for Success
You'll need a heavy-bottomed Dutch oven or deep pot with high sides to prevent oil splatter and maintain a consistent temperature. A lightweight pot won't retain heat well, causing temperature fluctuations that ruin doughnuts. Pour oil to a depth of 1½ to 2 inches - enough to submerge doughnuts but not so much that they flip over prematurely before the bottom sets.
A candy or deep-fry thermometer is non-negotiable for consistent results. Digital instant-read thermometers don't work well for frying because you need continuous monitoring, so invest in a clip-on thermometer designed for high-heat cooking. A 3-inch and 1-inch round cutter (or doughnut cutter) ensures uniform size and professional appearance. A wire cooling rack allows proper air circulation for crispy exteriors.
Recipe Variations, Serving Ideas & Storage
Variations
Decorating
Serving Ideas
Make-Ahead & Storage
Recipe Variations
Transform these classic doughnuts with simple coating changes for variety. Cinnamon sugar (½ cup granulated sugar mixed with 1-2 tablespoons cinnamon) is the traditional coating—roll warm doughnuts in this mixture for intense flavor that clings beautifully. Powdered sugar creates an elegant snow-dusted appearance perfect for Halloween ghosts when paired with candy decorations.
Create a vanilla glaze by whisking 2 cups powdered sugar with 3-4 tablespoons milk and 1 teaspoon vanilla until smooth and pourable. Dip warm doughnuts face-down into glaze, lift, and let excess drip off before placing on a wire rack to set. For chocolate glaze, melt 1 cup chocolate chips with 2 tablespoons butter and 1 tablespoon corn syrup for a glossy, bakery-style coating.
Add ½ teaspoon pumpkin pie spice to the dry ingredients for extra autumn flavor. Orange zest (1 tablespoon added to wet ingredients) provides bright citrus notes that pair beautifully with warm spices. For chocolate doughnuts, replace ½ cup flour with ½ cup cocoa powder and increase sugar by 2 tablespoons.
Decorating Ideas
Frankenstein doughnuts: Cover with green icing, dip the top edge in chocolate sprinkles to create "hair," and add two candy eyes plus a licorice "bolt" on each side. Vampire doughnuts: Use chocolate or red glaze, add candy eyeballs, insert plastic vampire fangs in the center hole, and pipe red gel icing as dripping blood. Mummy doughnuts: Drizzle white icing in zigzag patterns across the doughnut and add two candy eyeballs peeking through the "wrappings".
Spider web doughnuts: Glaze with orange, purple, or black icing, then pipe white melted chocolate in concentric circles from the center outward, dragging a toothpick through the circles to create web patterns. Monster doughnuts: Dip in bright green or purple glaze, add candy eyeballs in various sizes, and top with colorful sprinkles for a playful, kid-friendly design.
Set out bowls of different coatings and toppings - cinnamon sugar, powdered sugar, glazes, candy eyeballs, Halloween sprinkles, and edible gel icing - so guests can customize their own creations at parties. This interactive decorating station keeps children entertained while adults enjoy the nostalgia of making Halloween treats together.
Serving Ideas
Serve these doughnuts warm with hot apple cider for an authentic 1950s Halloween experience that connects you to the holiday's homemade treat traditions. Arrange them on a vintage cake stand or tiered dessert tray for nostalgic presentation that evokes church socials and neighborhood potlucks. The contrast between crispy exteriors and tender interiors is most pronounced when doughnuts are served within 4-6 hours of frying.
These pair perfectly with mulled cider, hot cocoa, or strong black coffee for adults seeking a cozy autumn treat. For children's Halloween parties, serve alongside orange juice, milk, or hot chocolate. The doughnuts also make excellent bases for creative Halloween decorations when you involve kids in the decorating process.
Make-Ahead & Storage
Store unfrosted doughnuts in an airtight container at room temperature for up to 3 days—they'll stay remarkably fresh thanks to the shortening. Never refrigerate doughnuts because cold temperatures actually accelerate staling by causing starch retrogradation, making them tough and dry. Layer doughnuts with waxed paper or parchment between levels if stacking to prevent them from sticking together.
Freeze unfrosted doughnuts for up to 2 months by wrapping individually in plastic wrap, then placing in freezer bags with as much air removed as possible. Freeze them in a single layer on a baking sheet first, then transfer to bags once solid to prevent crushing. Thaw at room temperature for 1-2 hours, then warm in a 300°F oven for 5 minutes to refresh texture and restore that just-fried quality.
Never freeze glazed or frosted doughnuts; the coating becomes sticky, messy, and separates from the doughnut when thawed. You can freeze the raw dough wrapped tightly in plastic and foil for up to 2 months, making this recipe perfect for advance Halloween prep. Thaw dough overnight in the refrigerator, then let it sit at room temperature for 10 minutes before rolling, cutting, and frying as directed.
Ingredient Substitution Guide
For the Buttermilk No buttermilk? Mix ¾ cup whole milk with 1 tablespoon white vinegar or lemon juice and let sit 5 minutes before using. This creates the acidity needed for proper rise, though it won't have quite the same depth of flavor as real cultured buttermilk. Greek yogurt (thinned with 2 tablespoons milk) or sour cream (thinned with 3 tablespoons milk) provides similar tanginess with slightly different textures.
For the Shortening Butter (¾ cup or 12 tablespoons) can replace shortening, but reduces shelf life to 1-2 days and creates a less craggy exterior. Melted coconut oil works for dairy-free versions with similar keeping qualities to shortening. Avoid using olive oil, which has too low a smoke point and an overpowering flavor for doughnuts.
For Frying Oil Vegetable oil, canola oil, peanut oil, or vegetable shortening all work well for frying, each with neutral flavor and appropriately high smoke points above 400°F. Traditional recipes used lard, which creates exceptional flavor and crispy texture, but isn't vegetarian. Avoid olive oil and butter for frying; both have smoke points too low for safe, effective deep frying at 365-375°F.
For the Flour All-purpose flour is standard and works perfectly in this recipe. Cake flour (3¾ cups) creates even more tender doughnuts with a delicate crumb, ideal if you want bakery-level lightness. To make your own cake flour substitute, use 3¼ cups all-purpose flour plus ¼ cup cornstarch, which mimics cake flour's lower protein content.
Frequently Asked Questions
Why are my doughnuts greasy and heavy?
Your oil temperature dropped too low, usually below 350°F. Greasy doughnuts absorb excess oil when fried at an insufficient temperature because the exterior doesn't set quickly enough to seal in moisture. Always use a thermometer and let oil return to 365-375°F between batches, even if it takes several minutes. Overcrowding the pot also lowers the temperature dramatically, so fry only 2-3 doughnuts at a time.
Can I use regular milk instead of buttermilk?
You'll lose the tangy flavor and tender texture that make these doughnuts special. Buttermilk's acidity reacts with baking soda to create extra lift and air pockets throughout the crumb. If you must substitute, add 1 tablespoon white vinegar or lemon juice to ¾ cup whole milk and let sit 5 minutes before using—this creates the necessary acidity for proper chemical leavening.
How do I know when the doughnuts are fully cooked?
They should be deep golden brown on both sides with no pale spots, which takes 2-3 minutes total frying time. The centers should spring back when gently pressed rather than leaving an indentation, and a toothpick inserted into the side should come out clean without raw batter clinging to it. If your first batch has raw centers, lower oil temperature slightly and increase frying time by 30-60 seconds per side.
Can I make the dough ahead of time?
Yes, refrigerate the wrapped dough for up to 24 hours before rolling and cutting, which actually improves texture and makes dough easier to handle. Let cold dough sit at room temperature for 10 minutes before rolling if it's too firm to work with easily. You can also freeze tightly wrapped dough for up to 2 months—thaw overnight in the refrigerator before using.
Why did my doughnuts turn out tough and dense?
You overmixed the dough, developing gluten that creates chewy texture instead of tender crumb. Mix only until flour just disappears—a few lumps are fine and will work out during frying. Another common cause is adding too much flour during rolling, which happens when dough isn't chilled properly first. Always chill dough at least 1 hour before rolling to firm up the fat and make it easier to handle.
Can I bake these doughnuts instead of frying them?
This particular recipe is formulated for frying and won't work well baked—the dough is too stiff and dry for baking, resulting in a dense, brick-like texture. Baked doughnut recipes use looser, cake-like batters with different ingredient ratios. If you prefer baked doughnuts, look for recipes specifically developed for baking rather than adapting this fried recipe.
Why do my doughnuts have raw centers even though the outsides are dark?
Your oil temperature was too high, cooking the exterior before the interior. Keep oil between 360-375°F maximum and fry for the full 2-3 minutes, flipping every 45-60 seconds. Doughnuts thicker than ½ inch may need a slightly lower temperature (around 350°F) and longer cooking time to ensure centers cook through without burning exteriors.
What should I do with the doughnut holes?
Fry them alongside the full doughnuts but reduce cooking time to about 1 minute total (30 seconds per side) since they cook much faster. Roll in cinnamon sugar or powdered sugar while warm, or turn them into spooky eyeballs by coating with white chocolate and adding candy decorations. Kids especially love doughnut holes because they're the perfect size for small hands.
Can I freeze baked doughnuts for serving later?
Yes, freeze unfrosted doughnuts immediately after they cool completely. Wrap individually in plastic wrap and store in freezer bags for up to 2 months, pressing out as much air as possible to prevent freezer burn. Thaw at room temperature for 1-2 hours, then warm in a 300°F oven for 5 minutes before sugaring or glazing. This makes them perfect for Halloween party prep weeks in advance without sacrificing quality.
These old-fashioned 1958 Halloween doughnuts bring back a nearly forgotten tradition, when homemade treats ruled the holiday and neighbors gathered to celebrate with warm, spiced doughnuts and hot apple cider. The combination of crispy exteriors, tender interiors, and aromatic spices creates doughnuts that taste like autumn itself; perfect for reviving this vintage Halloween custom in your own kitchen.
Do these vintage cake doughnuts remind you of childhood Halloween parties or family gatherings? What coatings or decorations would you try with this 1958 recipe? If you make these Halloween doughnuts, please leave a rating and review below to help other bakers!
Melissa is the creator of Recipe Rewind, where she preserves culinary history one vintage recipe at a time. With Wisconsin roots and a passion for desserts, she specializes in reviving original recipes like the 1908 Hydrox cookie - honoring the authentic versions before they're overshadowed by modern imitations. Self-taught from age seven with a Bisquick box and her Mamaw's handwritten recipe cards, her culinary passion has grown through international travel and raising four children. Today, she cooks in a truly multi-generational kitchen spanning five generations - from the Silent Generation to Gen Z - where timeless recipes bridge the decades. Melissa adapts vintage recipes for modern home cooks and bakers, believing food connects us all across generations, cultures, and time.


0 comments