If you have been to Cracker Barrel lately looking for Hydrox cookies and come home empty-handed, you are not imagining things. Hydrox, the original chocolate sandwich cookie introduced in 1908 by the Loose-Wiles Biscuit Company of Kansas City, four years before Oreo existed, has become genuinely hard to find, and the fans who grew up on it are not taking it well.
Baking homemade Hydrox cookies at home is the answer, and making this recipe more times than I care to admit, I can promise you: the homemade version is actually better than what came in the package.
Hydrox has had a rocky century. Discontinued in 1999 by Keebler, briefly revived in 2015 by Leaf Brands, and increasingly difficult to find at retail ever since, the cookie that started the whole sandwich cookie category has never quite gotten the shelf space it deserved.
Cracker Barrel was one of the last reliable places to find a physical bag, and even that has become uncertain. So here we are, making them from scratch, which is honestly how a cookie this good should be made anyway.
Back in the Edwardian Cookie Tin
In 1908, the Ford Model T had just rolled off the assembly line for the very first time, Teddy Roosevelt was wrapping up his presidency, and the concept of a factory-made chocolate wafer sandwich was genuinely exciting.
Packaged cookies were not yet a pantry staple. They were a novelty, a small luxury, a thing you might bring home to make Tuesday feel like a minor occasion.
The Loose-Wiles Biscuit Company named their creation "Hydrox" after hydrogen and oxygen, a nod to the era's enthusiasm for science and the idea that purity was something worth advertising. The name sounds alarming now (it does, be honest), but in 1908 it was practically aspirational.
Four years later, Oreo showed up and the marketing battle began. Most people never knew which cookie came first. You do now. Does knowing change how you feel about dunking your Oreo? We can unpack that in the comments.

The Merchant's Journal, Topeka Kansas December 19, 1910
What Makes This Homemade Hydrox Cookies Recipe Work
Black Cocoa Powder Is Non-Negotiable
The single most important ingredient in homemade Hydrox cookies is black cocoa powder, and it is the one thing you absolutely cannot substitute with whatever is in your pantry right now. Black cocoa is Dutch-process cocoa that has been heavily alkalized, which strips out the acidity, drops the pH, and produces that near-black color along with a smooth, roasted, low-bitterness chocolate flavor.
It is why the original chocolate wafer cookies tasted like a real Hydrox/Oreo rather than a chocolate sugar cookie with identity confusion. Regular cocoa makes a brown cookie. Black cocoa makes these cookies. You can find it online or at specialty baking stores. Check your local grocery store, though. I found it at my Kroger.
Room Temperature Butter Is Also Non-Negotiable
The butter must be at room temp. Cold butter will not cream properly with the sugar, and you will end up with a dense, greasy cookie dough that bakes up heavy rather than crisp and short. Soft butter, beaten in the bowl of a stand mixer fitted with the paddle attachment (or with a hand mixer on medium) until it is pale and fluffy, is what creates the structure that makes these wafers snap cleanly when you bite through the whole cookie.
Press a finger into your butter before you start. If it leaves a clean indent without the surface being shiny or slick, you are ready. If it sinks all the way to the bottom of the dish, your kitchen is too warm and you need to start over. Cold butter will betray you! Fair warning.
The Cream Filling Is a Fondant, Not a Frosting
The cream filling in a real Hydrox cookie is a fondant-style buttercream made with butter, vegetable shortening, powdered sugar, and pure vanilla extract. The shortening is intentional and important; it stabilizes the filling at room temperature, keeps it from softening into the wafer too quickly, and gives it that characteristic slight resistance when you bite through. The butter brings the flavor. The shortening holds the structure. You need both.
How much filling you use is honestly a personal decision, and one I encourage you to make with full enthusiasm. A generous tablespoon per cookie produces a sandwich cookie with presence. A thinner layer is more restrained. There is no wrong answer. There is only how much filling you feel like eating today.
Chilling the Dough Is A Must-Do
After mixing the cookie dough, you divide it in half, flatten each portion into a disc, wrap it in plastic wrap, and refrigerate it for at least an hour. This is the step most people skip. It is also the step responsible for most of the cookies that come out of the oven looking like chocolate puddles instead of chocolate wafers.
Chilling firms up the butter and relaxes the gluten so the wafers hold their edges cleanly and bake up flat. The good news is that the dough freezes beautifully, so if you are the kind of person who plans ahead, you can make it a week in advance. The wait is genuinely the hardest part.
Homemade Hydrox Cookies Recipe
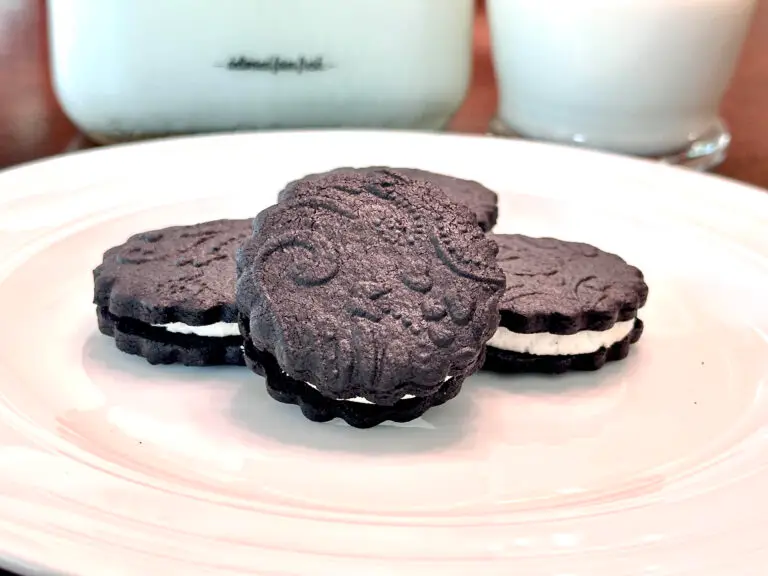
This homemade version of the iconic Hydrox sandwich cookies delivers all the chocolatey, creamy goodness of the original with crisp chocolate wafer cookies sandwiched around a sweet vanilla creme filling. Perfect for dunking in milk or enjoying as an afternoon treat, these cookies capture the essence of the beloved original that predated its more famous competitor. With simple ingredients and straightforward techniques, you can make these iconic cookies from scratch and enjoy the satisfaction of homemade nostalgia.
- Total Time: 1 hour 40 minutes
- Yield: 3 Dozen 1x
Ingredients
- 1 cup unsalted butter, softened
- 1 cup granulated sugar
- 1 large egg, room temperature
- 1 teaspoon vanilla extract
- 1 3/4 cups all-purpose flour
- 2/3 cups black cocoa powder (not baker's cocoa)
- 1/2 teaspoon baking powder
- 1/4 teaspoon baking soda
- 3/4 teaspoon salt
- 1/2 cup unsalted butter, softened
- 1/4 cup shortening (plain, not the butter-flavored variety)
- 2 cups powdered sugar
- 1/2 teaspoon clear vanilla extract (regular vanilla extract will work, though)
- 1/8 teaspoon salt
Instructions
- In a large mixing bowl, or a stand mixer bowl, cream together: 1 cup softened butter and 1 cup granulated sugar
- Add one room temperature egg, 1 teaspoon vanilla to the butter and cream mixture
- In a medium sized bowl, sift together: 1 ¾ cups all-purpose flour, ⅔ cups black cocoa powder, ½ teaspoon baking powder, ¼ teaspoon baking soda, and ¾ teaspoon salt
- Gradually combine the dry ingredients with the wet ingredients until a soft dough forms
- Form the dough into a smooth ball, then divide in half and flatten to form 2 discs. Wrap in plastic and refrigerate for about 1 hour
- Preheat oven to 350°
- Soften refrigerated dough at room temperature about 30 minutes, then roll the dough out to about 1/8 inch
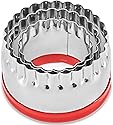
- Cut out using a 1½ inch cookie cutter
- Arrange on a baking sheet about 1 inch apart
- Bake for 9-10 minutes and allow to cool completely
For the Fondant Creme Filling
- Cream together: ½ cup unsalted softened butter and ¼ cup shortening
- Slowly add 2 cups powdered sugar until well mixed
- Finally, mix in ½ teaspoon clear vanilla extract and ⅛ teaspoon salt
- Transfer filling to a pastry bag fitted with ½ inch tip
- Pipe about 1 tablespoon of filling to the center of the bottom side of a cookie wafer, then sandwich using another cookie


How to Make Perfect Homemade Hydrox Cookies
Get the Dough Right Before Anything Else
Start by sifting your dry ingredients together: all-purpose flour, black cocoa powder, baking soda, baking powder, and salt. Black cocoa is dense and prone to clumping, and unsifted lumps bake into uneven dark spots in your wafers. Sift it.
Then cream your room temperature butter and sugar in a large bowl (or the bowl of a stand mixer with the paddle attachment) until the mixture is pale and fluffy, about three minutes. Add the egg and pure vanilla extract and beat until fully combined before you add the dry ingredients.
Add the dry ingredients gradually and stop mixing the moment the dough comes together. Overworking the dough develops the gluten in the all-purpose flour and makes your wafers tough rather than crisp. The dough should look slightly shaggy, not smooth like cookie dough from a tube. That is exactly right.
Roll Thin, Cut Clean, Work Quickly
After chilling, let the dough sit at room temperature for about 30 minutes before rolling. Dough that is too cold will crack at the edges, which is frustrating and fixable but also avoidable.
Sandwich the disc between two sheets of parchment paper and roll to about 1/8 inch thickness. Thicker wafers bake up cakey rather than crisp, and if you have made the 1950s homemade vanilla wafers, you already know exactly the texture you are after here. Same principle, deeper flavor.
Rolling between parchment is the move here: no extra flour muddying the color, no dough sticking to your work surface, and significantly less cleanup afterwards.
Use a 1.5-inch round cutter for classic bite-sized sandwich cookies. Arrange cut wafers on a lined baking sheet about an inch apart. If your kitchen is warm, slide the whole baking sheet into the refrigerator for 10 minutes before baking. Cold dough going into a hot oven holds its shape. Warm dough in a warm oven will spread, and not in a charming way.
Watch the Oven Temperature Like a Hawk
Set your oven temperature to 350°F. These wafers are nearly black to begin with, which means you cannot rely on color change to tell you they are done. Look for the edges to be completely set and the centers to look just barely dry.
They will firm up further on the wire rack as they cool, so pull them when they look like they could use exactly one more minute. That is the moment. If you wait for them to look fully done in the oven, they will be overdone on the rack. Set a timer because these go from perfect to bitter quicker than you might expect.
Build the Filling, Then Pipe It
Beat the room temperature butter and shortening together first until smooth, then add the powdered sugar gradually and the pure vanilla extract. The filling should be thick enough to hold its shape but soft enough to pipe without turning your pastry bag into a bicep workout.
If it is too stiff, add heavy cream one teaspoon at a time. If it is too soft, add a little more powdered sugar.
Pipe about a tablespoon of filling onto the flat side of half of the cookies. An offset spatula works if you do not have a pastry bag, and the result is charmingly rustic in a way that still tastes exactly the same. Top each filled wafer with a second wafer, flat side down, and press gently until the filling spreads evenly to the edges.
Recipe Variations, Serving Ideas, and Storage
Recipe Variations
Frequently Asked Questions
Hydrox cookies were introduced in 1908 by the Loose-Wiles Biscuit Company of Kansas City, making them the original chocolate sandwich cookie by four years. The Oreo appeared in 1912 and was produced by Nabisco.
The traditional Hydrox wafer uses a darker, more bitter cocoa than Oreo and the cream filling is a fondant-style buttercream that is less aggressively sweet. Most people who have tasted both side by side describe the Hydrox as richer in chocolate flavor and more balanced overall.
Absolutely not. Regular cocoa powder will not produce the same result in homemade Hydrox cookies. Black cocoa is heavily alkalized Dutch-process cocoa that creates the near-black color and smooth, low-acid chocolate flavor that makes these iconic cookies recognizable.
Standard cocoa produces a lighter brown wafer with a noticeably sharper, more acidic flavor. Dutch-process cocoa is the closest workable substitute if black cocoa is unavailable, though the color and depth will be somewhat milder.
Spreading in chocolate wafer cookies almost always comes down to one of three things: butter that was too warm when creamed, cookie dough that was not chilled long enough, or a warm baking sheet going into the oven.
For best results, chill the dough for the full hour, let it rest at room temperature for 30 minutes before rolling (not longer), and slide the cut-out wafers on their baking sheet back into the refrigerator for 10 minutes before baking if your kitchen is warm.
The cookie dough keeps in the refrigerator for up to three days and in the freezer for up to three months. Flatten it into discs, wrap tightly in plastic wrap, and store it until you are ready. This is one of the most flexible vintage recipes in terms of prep, which makes it ideal for holiday baking batches, gifting projects, or just having something genuinely good ready to go on short notice.
Lightly flour your work surface and rolling pin, or roll the dough between two sheets of parchment paper. Some bakers dust the rolling surface with a small amount of black cocoa powder rather than flour to maintain the deep color.
Homemade Hydrox cookies come together well with a hand mixer or with a wooden spoon and some determination. A hand mixer on medium speed creams the butter and sugar in three to four minutes.
By hand, plan for five to six sustained minutes. The dough is forgiving and the results are just as good either way. You do not need a stand mixer for this. You need soft butter and the willingness to commit.
Cream filling consistency depends almost entirely on butter temperature and the ratio of powdered sugar to fat. If the filling is too soft to hold its shape, add powdered sugar one tablespoon at a time until it firms up.
If it is too stiff to pipe without significant effort, add heavy cream one teaspoon at a time and beat until smooth. Room temperature butter (genuinely room temperature, not warm) gives you the most control over the outcome.
Fully assembled homemade Hydrox cookies freeze well for up to two months. Freeze them in a single layer on a baking sheet until solid, then transfer to a freezer-safe airtight container with parchment paper between layers.
Thaw at room temperature for about 30 minutes before serving. The texture stays close to fresh, and honestly, a cold Hydrox straight from the freezer is not a bad experience either.
A 1.5-inch round cutter produces a bite-sized sandwich cookie that closely matches the original Hydrox size. Cutters from 1.5 to 3 inches all work depending on how large you want your final cookies.
Larger cookies need an extra minute or two in the oven; smaller ones may be ready closer to the 8-minute mark. Check them early either way, because these dark wafers do not give you much visual warning before they cross from done to overdone.
Press a clean cooling rack gently into the rolled dough before cutting, or use an embossed rolling pin designed for cookies (I have one linked above). You can also skip the pattern entirely for a simpler, more rustic presentation.
Save This Homemade Hydrox Cookie Recipe For Later

The Cookie That Was Always Right
Hydrox cookies survived the Depression, two World Wars, and decades of being out-advertised by a corporation with considerably more marketing budget. That kind of staying power comes from flavor, not packaging.
Making them at home means the original recipe gets its due. Deeply chocolate, perfectly balanced, and genuinely worth the process.
Did you grow up eating Hydrox cookies, or were you a dedicated Oreo household? I want to know, especially if there were strong feelings involved. Leave a comment below, and if you make this recipe, please leave a rating and review. It helps more people find their way to the cookie that started it all.
0 comments