This 1941 pumpkin pie with molasses delivers rich, old-fashioned flavor using basic ingredients and a vintage mixing method that creates silky-smooth custard every single time. Unlike modern recipes that might rush the process, this wartime-era technique builds layers of flavor by combining spices with sugar first, then folding in pumpkin and eggs separately for a filling that never curdles or separates.
The secret lies in the molasses, which adds a subtle depth modern pies lack, and the careful order of ingredient additions that home bakers relied on before electric mixers became standard.
There's something about the smell of cinnamon and ginger mingling with warm pumpkin that pulls me straight back to childhood Thanksgivings. My grandmother kept a handwritten recipe card tucked inside her 1940s cookbook, stained with spills and creased from decades of use. The measurements matched this one almost exactly, right down to the "little molasses" instruction that made me smile.
The 1941 Kitchen
Thanksgiving 1941 arrived just weeks before Pearl Harbor would change everything about American life. Home kitchens still hummed with pre-war abundance, though housewives were already hearing whispers about potential rationing on the radio broadcasts of Gabriel Heatter and Edward R. Murrow.
That November, families gathered around tables set with Depression glass dessert plates, the kind with delicate etched patterns that caught the light from kerosene lamps in rural kitchens or new electric fixtures in city homes. Women pulled on cotton aprons, tied at the waist, and reached for their reliable wood-handled rotary beaters to mix pie fillings by hand. The lucky ones had electric refrigerators, but many still relied on iceboxes, which meant careful planning for holiday baking.
Pumpkin pie had become a symbol of Northern values and Thanksgiving tradition, thanks to Sarah Josepha Hale's writings decades earlier, though Southern tables often featured sweet potato pie instead. Congress had just officially declared Thanksgiving a national holiday in 1941, ending years of debate about the date and regional resistance to what some Southerners viewed as Yankee cultural imposition. Making this pie in 1941 meant something more than dessert; it represented unity and tradition during uncertain times.
What Makes This Pumpkin Pie Special
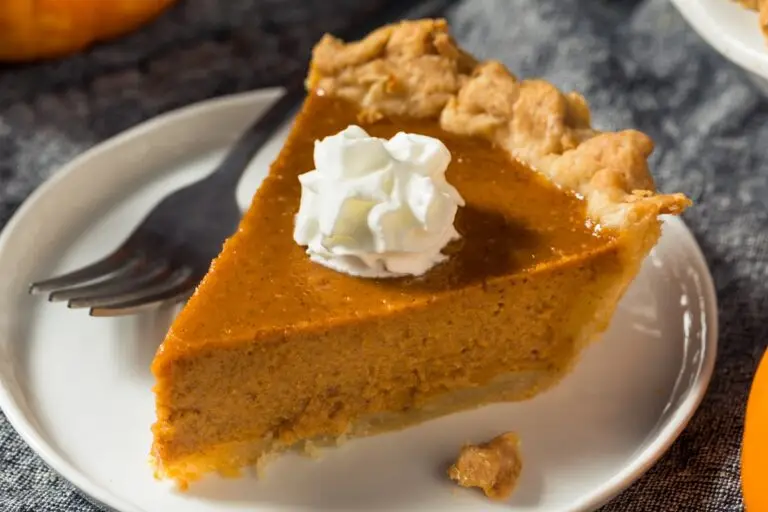
1941 Pumpkin Pie Recipe with Molasses Recipe
This authentic 1941 pumpkin pie uses molasses and a vintage mixing technique that creates the silkiest custard filling. The careful layering of ingredients prevents curdling and produces a pie that slices cleanly every time.
- Total Time: 1 hour 15 minutes
- Yield: 8 servings 1x
Ingredients
- 1 unbaked 9-inch pie crust, homemade or store-bought
- 2 large eggs
- 1 1/2 cups strained pumpkin puree (not pumpkin pie filling)
- 3/4 cup granulated sugar
- 1 level teaspoon ground cinnamon
- 1/2 teaspoon salt
- 1 1/2 cups whole milk
- 1 level teaspoon ground ginger
- 1-2 tablespoons molasses (adjust to taste)
Instructions
- Preheat the Oven: Preheat your oven to 350°F. Place your unbaked pie crust in a 9-inch pie pan and crimp the edges decoratively.
- Mix the Spice Blend: In a small bowl, combine the sugar, ground cinnamon, ground ginger, and salt. Whisk together vigorously with a fork until there are no lumps and the spices are evenly distributed throughout the sugar.
- Combine with Pumpkin: Add the spice-sugar mixture to the strained pumpkin in a large mixing bowl. Stir thoroughly until completely combined and the mixture is smooth with no sugar pockets remaining.
- Beat the Eggs: In a separate bowl, beat the eggs with a rotary beater, wire whisk, or fork for about 2 minutes until they turn pale yellow and slightly foamy
- Add Eggs to Pumpkin: Pour the beaten eggs into the pumpkin-spice mixture and stir well to incorporate completely.
- Stir in Molasses: Add 1-2 tablespoons of molasses (start with 1 tablespoon for subtle flavor, use 2 for deeper molasses taste) and mix until evenly distributed.
- Add Milk Last: Gradually pour in the milk while stirring constantly to prevent separation. Continue mixing until the filling is completely smooth and uniform in color.
- Fill the Pie Shell: Pour the filling into the prepared unbaked pie crust. Tap the pan gently on the counter to release any air bubbles.
- Bake: Place the pie on the center rack of the preheated 350°F oven. Bake for 50-60 minutes, or until the edges are set and slightly puffed, but the center still jiggles gently like soft gelatin when you shake the pan. A knife inserted 2 inches from the edge should come out clean.
- Cool Completely: Remove the pie from the oven and place it on a wire cooling rack. Allow it to cool for at least 2-4 hours before slicing. The filling will continue to set as it cools.
- Serve: Serve at room temperature or slightly chilled. Store covered in the refrigerator for up to 4 days.


Notes
- Strained Pumpkin: If using canned pumpkin puree, press it through a fine-mesh strainer to remove any fibrous bits for the smoothest texture.
Nutrition
- Calories: 245
- Sugar: 24g
- Sodium: 230mg
- Saturated Fat: 3g
- Carbohydrates: 38g
- Fiber: 2g
- Protein: 5g
- Cholesterol: 55mg
How to Make A Perfect 1941 Pumpkin Pie
Recipe Variations, Serving Ideas, and Storage
Recipe Variations
Frequently Asked Questions
Absolutely, and it's more authentic to the 1941 recipe. You'll need about 2 cups of cooked, mashed, and strained pumpkin from a 3-4 pound sugar pumpkin. Roast the pumpkin halves cut-side down at 350°F until tender, scoop out the flesh, and strain through cheesecloth or a fine-mesh strainer to remove excess moisture.
Cracking happens when the oven temperature is too high or the pie bakes too long, causing the custard to overcook and shrink. Bake at 350°F and remove the pie when the center still jiggles slightly. The gentle, even heat prevents thermal shock that creates cracks.
Yes, though you'll lose the distinctive old-fashioned flavor. Substitute dark corn syrup, honey, or maple syrup, or simply increase the sugar by 2 tablespoons and add ½ teaspoon vanilla extract. Each substitution creates a slightly different flavor profile but still produces a delicious pie.
The edges should be set and slightly puffed, while the center jiggles gently like gelatin when you shake the pan. A knife inserted 2 inches from the edge should come out clean, but the very center can still look slightly underdone. It will finish cooking as it cools.
Excess moisture in the pumpkin, underbaking, or cutting into the pie before it's completely cooled are the usual culprits. Make sure your pumpkin is well-drained or strained, bake until the filling is just set, and allow at least 2 hours of cooling time before slicing.
A standard 9-inch pie pan works perfectly, either metal, glass, or ceramic. Glass and ceramic Pyrex pans became popular in the 1940s and distribute heat evenly for custard pies. Metal pans conduct heat faster and can create a crisper bottom crust.
Yes, simply double all ingredients and bake two pies. The baking time remains the same since you're making two separate pies rather than one larger one. This is perfect for feeding a crowd or having leftovers for the weekend after Thanksgiving.
Brush the unbaked pie shell with a thin layer of beaten egg white and let it dry for 5 minutes before adding the filling, which creates a moisture barrier. Baking on the lowest oven rack also helps the bottom crust cook more thoroughly. Some bakers prefer blind-baking the crust for 10 minutes first.
Pumpkin puree is plain cooked pumpkin with nothing added, while pumpkin pie filling comes pre-sweetened and pre-spiced. Always use plain pumpkin puree for this recipe so you can control the sweetness and spice levels yourself. Check the ingredient list to make sure you're buying the right product.

There's something so satisfying about making a pie the same way someone did 80 years ago, using measurements scrawled on a yellowed recipe card and techniques passed down through generations. This isn't just dessert; it's edible history, a taste of Thanksgivings celebrated before the world changed forever.
What pumpkin pie memory brings you back to your family's table? If you make this 1941 Thanksgiving Pumpkin Pie with Molasses, please leave a rating and review!
0 comments