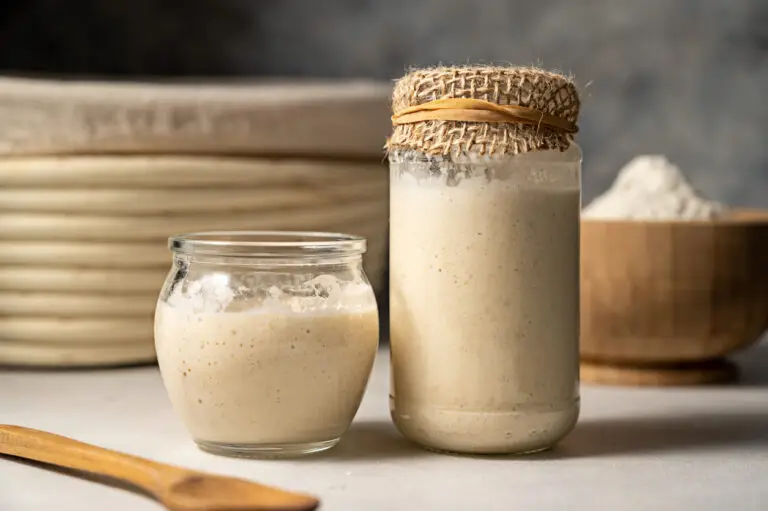
Learning how to make sourdough starter from scratch takes flour, water, 14 days of consistent feeding, and patience while wild yeast colonizes the mixture. I've killed a few starters learning this process, and the one I maintain now is almost a year old. It still amazes me that the same simple ratio (equal parts flour and water by weight) and steady warmth (75-80°F) can create something alive enough to make bread rise.
You'll know fermentation is working when bubbles start appearing around day 2 or 3, and the mixture smells sharp and yeasty; kind of like beer mixed with yogurt. By day 14, a healthy starter should double in size within 4-8 hours of feeding and pass the float test (drop a spoonful in water and it floats). Mine took closer to 16 days the first time I got it right, so if yours needs extra time, that's normal. Once it's active, you can make bread without commercial yeast - the way my great-grandmother did before packets of instant yeast existed.
What I Learned Through Failed Starters
Temperature made the difference between my successful starter and the ones I killed before it. Sourdough needs consistent warmth between 75-80°F to activate wild yeast. My first attempt sat on a cold counter in January; it barely bubbled after a week. My second try, I put it near the oven vent thinking more warmth was better. It smelled like nail polish remover by day 5. The third time, I found a spot on the coffee bar counter next to the fridge that stays around 78°F, and that's when it finally worked.
Weighing flour and water matters more than I expected. Equal parts by weight (not volume) creates the environment yeast needs to multiply. I eyeballed it my first few tries using measuring cups, and the consistency was different every time; sometimes too thick, sometimes soup. When I started using a kitchen scale, my feedings became predictable. This is the one place where precision actually helps instead of just adding extra steps.
The texture tells you if your ratios are right. A healthy starter should look like thick pancake batter—it pours slowly but isn't paste. If it's so thin you can see through it when you tilt the jar, add slightly less water next feeding. If it's so thick it barely moves, add a bit more. Mine was too thick for the first month because I was scared of making it soupy, and it took longer to rise. Once I loosened it up, fermentation got faster.
Ancient Egypt's Accidental Discovery
The oldest evidence of sourdough dates to ancient Egypt around 1500 BCE, where someone left flatbread dough sitting out overnight and discovered it had risen by morning. The Egyptians recognized that this accidental fermentation created lighter bread with better flavor than their standard unleavened loaves. They didn't understand the microbiology of the process, but they understood the results, so they started maintaining portions of fermented dough to leaven the next day's bread.
This technique spread throughout the Mediterranean as the Greeks adopted sourdough baking and moved it from home kitchens into commercial bakeries. The Romans refined the process further, developing regional variations that eventually evolved into the European bread traditions we recognize today. For over 5,000 years, sourdough was the only leavening method available to bakers. Commercial yeast has existed for less than 150 years, making it the new kid on the block despite its current dominance in modern baking.
Sourdough culture became particularly important during westward expansion in America, where miners during the California Gold Rush carried starter in pouches around their necks to keep it warm. The Boudin Bakery in San Francisco claims their starter traces back to the 1849 gold rush, maintained continuously for over 170 years through daily feedings and careful temperature management. Whether that specific claim holds up to scrutiny or not, the tradition of keeping starter alive across generations was common practice before refrigeration made storage easier.
What Makes This Sourdough Starter Recipe Work
Sourdough Starter Recipe
This traditional sourdough starter recipe requires only flour and water to cultivate wild yeast over 14 days. Follow the simple feeding schedule to create an active starter that will leaven bread for years to come. No commercial yeast needed.
- Total Time: 14 Days
- Yield: 1 Cup Active Starter 1x
Ingredients
- 1 cup + 1 tbsp wheat flour (leveled)
- 3/4 cup filtered or bottled water
- 4 Tbsp wheat flour
- 1/3 cup water
- 4 Tbsp wheat flour
- 1/3 cup water
Instructions
Day 1:
- Thoroughly mix 1 cup + 1 Tbsp wheat flour with ¾ cup filtered or bottled water in the mason jar until no dry flour remains.
- Cover loosely with lid or cloth to allow airflow.
- Place in a warm spot (75-80°F, not in direct sunlight) for 24 hours.
Day 2:
- Observe the starter for any bubbles or activity.
- Stir the mixture and cover again.
- Leave undisturbed for another 24 hours.
Days 3-4:
- Remove and discard ½ cup of starter from the jar.
- Add 4 Tbsp wheat flour and ⅓ cup water to the remaining starter.
- Mix thoroughly until combined.
- Mark the height with a rubber band to track rising.
- Cover and place in warm spot for 24 hours.
Days 6, 8, 10, 12, 14:
- Remove and discard 2 Tbsp of starter before feeding.
- Add 4 Tbsp wheat flour and ⅓ cup water to remaining starter.
- Mix thoroughly until smooth.
- Mark the height and cover.
- Place in warm spot.
- Watch for doubling in size within 4-8 hours by day 14.
Testing Readiness:
- When starter doubles in size and shows active bubbles, perform float test.
- Drop small spoonful of starter into glass of water.
- If it floats, the starter is ready to use for bread.
Equipment
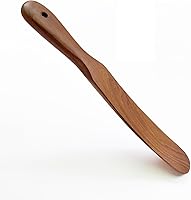
Handmade Teak Spurtle for Sourdough Starter
Buy Now →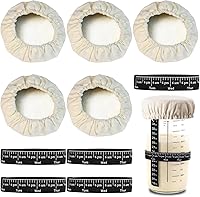
5 pcs Sourdough Jar, Cloth Cover, Elastic Marker
Buy Now →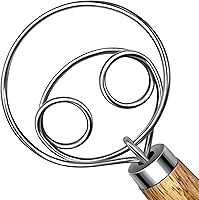 Buy Now →
 Notes
Equipment Needed:
- 32 oz mason jar (or similar clean glass container)
- Kitchen scale (recommended for accuracy)
- Rubber band or tape (for marking height)
- Spoon or spurtle for stirring
Nutrition
- Serving Size: 1/4 cup
- Calories: 120
How to Make Perfect Sourdough Starter From Scratch
Recipe Variations and Storage
Recipe Variations
Frequently Asked Questions
A sourdough starter requires 14 days of consistent feeding to develop full strength, though you may see fermentation activity beginning around day 3-4. The two-week timeline ensures that beneficial bacteria and wild yeast have fully colonized your mixture and can reliably leaven bread without commercial yeast.
Starter fails to rise because of insufficient warmth, too much discard left in the jar before feeding, or overly thin consistency. Move the starter to a warmer location between 75-80°F, use only 25 grams of starter when feeding, and adjust water amounts to achieve a thick batter consistency.
Tap water works for sourdough starter only if you let it sit uncovered for 24 hours to allow chlorine to evaporate. Chlorine kills the bacteria and yeast you're trying to cultivate, so filtered or bottled water produces more reliable results without the waiting period.
Healthy sourdough starter smells tangy, yeasty, and slightly sour like yogurt or fermented grain. If your starter smells like nail polish remover or rotting food, the temperature is too warm or you're waiting too long between feedings, allowing the wrong bacteria to dominate.
Yes, you must discard a portion of starter before each feeding once it's active. Discarding removes waste products and makes room for fresh flour and water, preventing your starter from growing exponentially in volume. Save the discard for pancakes, crackers, or other recipes instead of throwing it away.
Sourdough starter is ready when it doubles in size within 4-8 hours of feeding and passes the float test. Drop a small amount in water and if it floats, the starter contains enough active yeast to leaven bread successfully.
You can make sourdough starter with all-purpose flour alone, though starting with wheat flour accelerates fermentation because whole grains contain more natural yeast and nutrients. After the first few days, you can switch to all-purpose flour for maintenance feedings if you prefer.
Remove refrigerated starter 24 hours before baking, discard a portion, and feed it with fresh flour and water. Let it come to room temperature and show visible signs of activity before using it in bread dough, which typically requires 8-12 hours at room temperature
The float test involves dropping a small spoonful of starter into a glass of water. If the starter floats on the surface, it contains enough trapped carbon dioxide to leaven bread and has reached peak activity. Starter that sinks immediately needs more time to ferment.
Liquid on top of starter, called hooch, indicates the starter has consumed all available food and needs feeding. Pour off the liquid or stir it back in, then discard a portion of the starter and feed it with fresh flour and water to restore activity.

Do you remember the first time you successfully made bread rise without store-bought yeast? There's something satisfying about cultivating wild yeast from nothing more than flour and water. If you make this sourdough starter from scratch, please leave a rating and review!
0 comments