Angel food cake intimidates even confident bakers - all those egg whites, the mysterious ungreased pan, the upside-down cooling ritual that seems downright bizarre. This angel food cake recipe, pulled straight from 1950s kitchens, walks you through each visual cue and texture change, turning what feels like culinary acrobatics into a series of clear, manageable steps. You'll beat 8-10 egg whites into glossy peaks, fold in sifted flour with deliberate strokes, then bake at 300°F for just over an hour until the cake springs back under your fingertip.
What makes this vintage approach work is the built-in forgiveness of the meringue method. The cream of tartar stabilizes your egg whites so they hold their structure through multiple folding stages. The low oven temperature means you have a generous window before the top browns. The recipe even tells you exactly how many times to sift (four!) and when your peaks are stiff enough. Each instruction anticipates where you might second-guess yourself.
Once you master this meringue method, you'll find it works beautifully in other vintage cakes like this classic 1950s lemon sponge cake, which uses the same separated egg technique with bright citrus flavor.
Back in the 1950s Kitchen
While Eisenhower occupied the White House and I Love Lucy flickered on black-and-white televisions, angel food cake reigned as the elegant centerpiece for bridge club luncheons and Sunday dinners. Home cooks treasured their tube pans and took pride in achieving towering height and snow-white crumb.
This was the era of Tupperware parties and Betty Crocker, when baking from scratch signaled both skill and hospitality. Angel food cake fit perfectly into this world because it showcased technique over expensive ingredients, turning simple egg whites into something worthy of your best cake stand. Did your grandmother cool hers upside down over a glass bottle while the kitchen filled with vanilla-scented air?
Why This 1950s Angel Food Cake Still Works Today
1950s Angel Food Cake Recipe
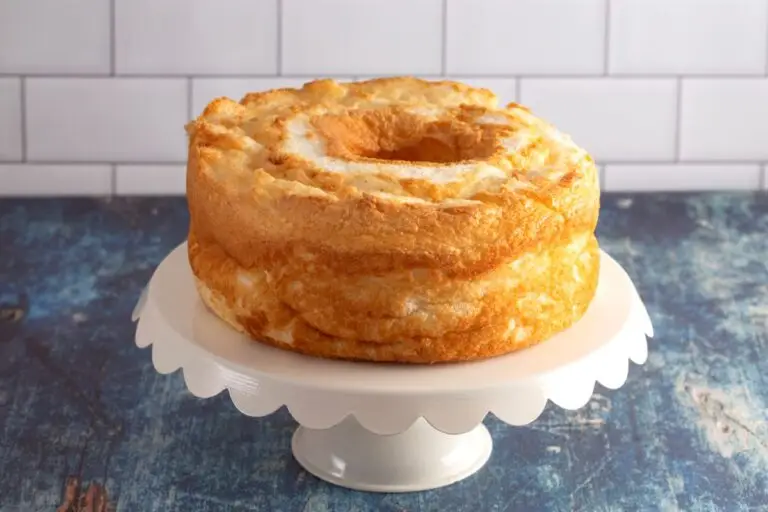
This authentic 1953 angel food cake delivers cloud-like texture and tender sweetness using a traditional meringue method. The recipe produces a tall, pristine white cake that showcases the elegant simplicity of vintage baking. Serve with fresh berries and whipped cream for a timeless dessert that feels both nostalgic and refined.
- Total Time: 1 Hour 30 Minutes
- Yield: 12 Servings 1x
Ingredients
- 1 cup sifted cake flour
- 3/4 cup granulated sugar (for flour mixture)
- 1/2 cup granulated sugar (for meringue)
- 1 1/4 cups egg whites (8-10 large egg whites)
- teaspoon cream of tartar
- 1/4 teaspoon salt
- 1 teaspoon vanilla extract
Instructions
- Preheat your oven to 300°F. Do not grease your 10-inch tube pan.
- Measure cake flour into a sifter, then sift it once. Measure out exactly 1 cup of the sifted flour. Add 3/4 cup sugar to the measured flour and sift the mixture together 4 times onto a piece of waxed paper. Set aside.
- In a large bowl, beat egg whites with a hand mixer or whisk until foamy, about 2 minutes. Add cream of tartar and salt, then continue beating until the mixture stands in soft peaks.
- Add the 1/2 cup sugar for the meringue 2 tablespoons at a time, beating well after each addition until the sugar dissolves completely. Continue beating until the meringue forms stiff, glossy peaks. Add vanilla extract and beat briefly to incorporate.
- Sift about 1/4 of the flour-sugar mixture over the meringue. Fold in gently with a rubber spatula using a down-across-up-and-over motion until just blended. Repeat with remaining flour-sugar mixture in 3 more additions, folding until no streaks remain.
- Pour batter into the ungreased 10-inch tube pan. Smooth the top gently and tap the pan on the counter 2-3 times to release large air bubbles.
- Bake in the preheated oven for 1 hour and 10 minutes, or until the top springs back when lightly pressed with your fingertip.
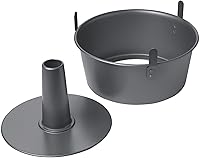
- Immediately invert the pan and hang it upside down to cool completely, about 1 1/2 hours. If your pan has feet, rest it on those. If not, invert the center tube onto the neck of a wine bottle.
- When completely cool, run a thin knife around the sides and center tube to loosen the cake. Remove from pan, slice with a serrated knife, and serve.


- Prep Time: 25 Minutes
- Cook Time: 1 Hour 10 Minutes
- Category: Dessert
- Method: Baking
- Cuisine: American
How to Make Perfect Angel Food Cake from Scratch
Recipe Variations, Serving Ideas, & Storage
Recipe Variations
Frequently Asked Questions
Cake flour produces the most tender results because it has less protein than all-purpose flour, which means less gluten development. If you must substitute, use 1 cup all-purpose flour minus 2 tablespoons, then add 2 tablespoons cornstarch and sift the mixture together at least 5 times. The texture won't be quite as delicate as the original, but it will still work.
The cake's structure hasn't fully set when it comes out of the oven. Cooling it upside down prevents it from collapsing under its own weight as it cools and sets. The inversion stretches the cake downward, which actually helps create that characteristic tall, fluffy texture. If you try to cool it right-side up, you'll end up with a dense, compact cake about half the height.
No, cream of tartar is essential and cannot be substituted with lemon juice or vinegar in this recipe. It stabilizes the egg white foam by preventing the proteins from bonding too tightly, which keeps your meringue from deflating or weeping. Without it, the cake will collapse in the oven or during cooling. If you don't have cream of tartar, save this recipe for another day when you can pick some up.
Lift your whisk or beaters straight up out of the meringue. If the peaks stand straight up without curling over, you've reached stiff peaks. The meringue should look glossy and smooth, not grainy or dry. If the peaks curl over at the tips, keep beating for another minute and test again. Underbeaten whites won't give you enough lift, and overbeaten whites will look curdled and won't fold smoothly into the flour.
Each sifting aerates the mixture and creates an exceptionally fine, light texture that folds into the delicate meringue without deflating it. This might seem excessive, but it makes a measurable difference in the final cake height and tenderness. Unsifted flour forms lumps that require more aggressive stirring to incorporate, which knocks out air bubbles you worked hard to create.
The tube pan is necessary for proper baking and cooling. The center tube allows heat to reach the middle of the cake, ensuring even baking throughout. Without it, the outside would set before the inside finished baking. The tube also provides structure for inverting and cooling. If you try using a regular pan, the cake will be dense and gummy in the center.
Make lemon curd, homemade mayonnaise, custard, or hollandaise sauce. You can also add them to scrambled eggs for extra richness, use them in pasta dough, or freeze them for later use. Egg yolks freeze beautifully for up to 6 months. Just whisk them gently with a pinch of salt or sugar (depending on whether you'll use them for savory or sweet recipes), pour into ice cube trays, and freeze.
You either under-beat the egg whites (stopping at soft peaks instead of stiff), deflated the meringue by stirring too vigorously when folding in the flour, or used a greased pan that prevented the cake from climbing up the sides. Another possibility is that you didn't cool it upside down, which caused it to compress. Make sure you're following each step carefully, especially the meringue beating and gentle folding technique.
Yes, angel food cake actually benefits from a day of aging. Bake it a day ahead, cool it completely, and leave it in the pan loosely covered with a clean kitchen towel. Remove it from the pan and slice it the day of your event. The texture becomes even more tender and easier to slice cleanly after 24 hours. Don't frost it or add toppings until just before serving, as moisture will make the delicate cake gummy.
Use a long, thin knife with a straight blade (not serrated). Run it carefully around the outer edge, keeping the blade pressed against the pan, not the cake. Then run the knife around the center tube in the same way. Finally, push up on the removable bottom to release the cake. If the bottom is stuck, slide the knife between the cake and the pan bottom using a careful sawing motion. Work slowly and patiently.
Pin This Classic 1950s Angel Food Cake Recipe For Later

This 1953 angel food cake recipe proves that sometimes the simplest techniques create the most memorable results. The meringue method might take a little patience, but watching a cloud-white cake emerge from your oven makes every careful fold worth it.
Did someone in your family have a special occasion when they'd make angel food cake? Was it always for birthdays, or did it appear at Easter dinner with strawberries? If you make this classic 1953 angel food cake recipe, please leave a rating and review!
0 comments